

Holiday Gift Guide
Unsure of what to give to the cyclist in your life this holiday season? Our Holiday Gift Guide is here to help you out!
The Holidays are here, and with them come all sorts of cool items (and bikes) to give to the special cyclists in your life!
If you've ever found yourself struggling to figure out what a fun, usable gift would be for a cyclist (be it commuter, roadie, mountain biker, or bike enthusiast) have no fear! We have put together a Holiday Gift Guide to help your holiday season be loaded with fun!
We have broken down our guide into 5 categories:
- Shop favorites - some of the staff shares their favorite things
- Stocking Stuffers - small, fun items
- "The Big One" - someone's getting a new bike this year, aren't they?
- Stay Warm - it's winter time, what's a better gift than to help a cyclists keep riding, despite the temps
- On-the-go - bike commuter life!
SHOP FAVORITES
Chris' Favorites:
Even though it is colder out now, this is the time of year many of the new products come trickling into the shop. It’s a great time for us because if there is something we haven’t had a chance to take a close look at, or we haven’t seen in person yet, we get to spend some time evaluating it.
These are some of the pieces of equipment that have especially caught my attention:
Lights, lights, lights.
The evolution of LED technology is great for us. I ride with an LED taillight on all of my rides now, day or night. I’ve experienced more courtesy from drivers, and wider berth when they pass me. I attribute this simply to drivers being aware of my existence from farther away and a conscious/ subconscious ability to prepare for a pass.
I personally ride with the Specialized Stix Comp. Simple, small, lightweight, clever in design, and with enough battery life to last me on my long rides. Specialized just redesigned these for their second generation with more lumens and better lenses to make those lumens go farther. Aside from the included mount for handlebar or seatpost, there is a full complement of mounts available for helmet, pant leg, belt, seatbag, rack, aero seatpost, or if you have a Specialized saddle, a bolt-on saddle mount (especially helpful for droppers). The light itself is a USB stick (Stix) and will plug directly in for a very quick charge to full.
- Stix Sport $30
- Stix Comp $45
- Stix Sport Pair $55
The other top contender are the Cycliq light/cameras. Kelly has been using her FLY 6 taillight for about 6 months now. It combines a bright, 6 hour life taillight with a camera that records on a 6 hour loop. You can export the video (complete with timestamp) after your ride, or just let it be and it will record over it. It has an intuitive beep system to notify the user of battery life upon turn on and shut off. This light offers great piece of mind for identifying aggressive drivers or just pulling some video to post of your friends on your last big ride!
We also have the Cycliq FLY 12 headlight/camera! The headlight is a 400 lumen headlight combined with a 1080p camera. More lumens and recording time (higher quality video as well) than the taillight, and with plenty of mounting options.
Cycliq FLY 12 Headlight Camera $269
Cycliq FLY 6 Taillight Camera $135
Cygolite Hotshot
The Hotshot has been a great rechargeable LED taillight since LED lights have gained traction. These things are BRIGHT. With a seatpost or seatstay mounting bracket, the light can easily be clipped on and off for charging. Not as flexible as the Stix lights, but the Hotshot 100 packs more light at $40, and the Hotshot 50 comes in with half the lumens for $30. Both rechargeable with usb cord (included).
On the headlight front, most of us use a light out of the Niterider Lumina series. These are compact, all one piece light/battery headlights with good mounting brackets (helmet or handlebar) we stock from 550 lumen to 900 lumen in this range. All of the lights have plenty of brightness settings to ration battery accordingly, and a red light low battery indicator that notifies the user well in advance. Walk mode is a really nice feature. At 30-50 lumens and ~18 hours of battery life I use the Lumina as a compact flashlight while camping or around the house all the time.
With headlights durability, battery endurance (short and long term), and brightness is really important! I have been using the Lumina light series for years and have never had a failure. The estimated run times have always been spot on or more generous than listed, and battery degradation has been imperceptible. And I night ride a lot in the winter months.
The other favorite here is the Cygolite Dash Pro. Definitely geared more towards the commuter vs. the Lumina. It has daytime running lamps in addition to the typical headlight for road surface visibility. Great for catching motorist attention around town. Both sets of lights can be controlled individually.
- Dash Pro 600 Lumen $65.99
- Lumina 550 $49.95
- Lumina 750 $64.99
- Lumina 900 Boost $79.95
Wahoo Bolt Compuer
I like to have data. Whether to share on Strava, see what the temperature was like on a similar ride from a previous year, or just how my heart rate was on a climb I’ve used a gps for almost 7 years now on my rides. My favorite these days is the Wahoo Bolt. Compact, great high contrast (no glare) screen and REAL BUTTONS. I am so done with touch screen units. This Bolt computer doesn’t lag, has all the features I use (including routes) and is really simple and intuitive to manipulate. With Wahoo’s phone app setup is easier than any other unit I’ve used and performance is awesome! I won’t be getting anything else anytime soon.
- Price - $250
- Full review at DC Rainmaker
Insulator Mitts!
Specialized Insulator Mitt
This just came in a few days ago and I was immediately excited about it. I have very cold hands and feet in general, and in January/February really struggle, especially on long, nighttime rides. I have some of the Element 3.0 gloves with Gore Windstopper which are wonderful. I used them down to temps in the single digits, but at 9 degrees my fingers aren’t exactly warm after 30 minutes.
Having previously tried Bar Mitts and not being impressed I am excited to get the Insulator Mitts on my bike. My first impression is that they feel like a nice sleeping bag for your hands!
The Insulator Mitt has primaloft insulation, which is a lightweight, synthetic, high loft, insulation that retains much of its insulative properties wet. There is also a pocket on each mitt inside the mitt for chemical hand warmers if needed. It would be nice to ride with these on a 20 degree day with only liner gloves on!
ISSI Pedals
The ISSI line of pedals is a newer, colorful line of pedals we have really liked at the shop. Using the popular SPD cleat design, the ISSI line provides some cool options. The Flash series is the smaller platform, lighter weight side of things. Coming in at 342g per pair, they come in the economical Flash up to the Flash 3, the latter coming with 3 sealed cartridge bearings. That’s one more bearing than Shimano, and the Flash 3 comes in many, many colors, most of which we have here at the shop.
The Trail pedals share the same bearing technology as the Flash series except with a larger platform. Coming in at around 412g per pair and also available in many colors in the Trail 3.
All of the ISSI pedals have ample float and are compatible with other SPD cleats.
- ISSI Flash:
- Flash- 352g/pair 2 bushing, Black.
- Flash 2- 340g/pair 2 bearings, 1 bushing, All the colors!
- Flash 3- 342g/Pair 3 Bearings, All the colors!
- Trail:
- Trail 1- 416g/ Pair 2 Bushings, Black
- Trail 2- 402g/ Pair 2 Bearings, 1 bushing.
- Trail 3- 408g/ Pair 3 Bearings, All the colors!
The Q Factor is roughly 4mm narrower on standard pedal vs. XTR, which will be good for most people. Almost all models available in a +6 and +12 spindle option (not available in colors). XTR pedal is 310g for comparison and has 2 bearings and slightly lower stack height. These pedals are rebuildable, XTR are not.
Kelly's Favorites:
Specialized Base Miles Featherweight Backpack
These packs are new from Specialized for 2018. I received one of these while out at the Dealer Event this past September. Knowing that I would be coming home with and extra bag (and I do carry-on as much as possible for flights), I was excited to see how this bag would do with carrying things on my flights home.
I ended up using this backpack for the whole dealer event and was extra stoked on how well it did with traveling home. It fits perfectly under the plane seats, even while holding my laptop, books/magazines, travel goodies, and having my helmet attached to the outside. It is very lightweight, and has just the right amount of large space and number of pockets. The reflective elements along the outside are REALLY reflective, and the Helmet clip/straps keep your helmet securely in place - no sliding around or flopping to one side.
Besides all of the cool pocket spots, the other detail of this pack that I like a lot is the magnetic strap clip. You can pretty much get it clipped with one hand.
This pack comes in 2 colors. One is "women's" specific, and I have only been able to discern one difference between to two, besides the color - the chest strap sits higher on the women's design. Both colors have been shown to be popular regardless of gender, so pick the color that you like, and I'm pretty sure you'll be as stoked as I am about this pack! :)
- Grey Featherweight Backpack - $130.00
- Black Featherweight Backpack - $130.00
Drierelease Merino Neck Gator
Neck gators are one of my favorite cycling clothing accessories. I'm one of those people that gets a bit irritated if I'm over heating in any way. My core and hands stay pretty warm for the most part, but there are those days where you want just a little bit of extra insulation. That's where the neck gator comes in. It also functions as ear/partial face cover for those super crisp cold mornings or windier days. The Drirelease one from Specialized is especially nice for the winter months because it's a bit heavier weight and dries quickly (Drirelease technology). It also has a cinch cord to lock in warmth for when those temps drop (I've made mine into a hat for times off the bike, too).
- Drireliease Merino Neck Gator - $25.00
SWAT Compatable Bottle Cages and Multi-tools
Never worry about losing your multi-tool or forgetting to bring one with you again! There are a variety of bottle cages and tools to mount on your bike - road and mountain bike specific.
I'm pretty notorious for losing multi-tools, so when all this cool SWAT stuff (Storage, Water, Air, Tools) came out from Specialized, I got pretty excited.
- Zee Cage II - $20.00
- Rib Cage II - $20.00
- EMT Cage Mount Tool - MTB - $35.00
- EMT Cage Mount Tool - Road - $35.00
Adams Favorites:
Enduro Pro Shorts $130 - The shorts are awesome because they include both baggies and bibs. The SWAT bib shorts have pockets on the back similar to jersey pockets so you can wear any shirt you want and still have your gear.
POC VPD 2.0 Knee Pads $110 - I use these knee pads when riding the rocky local trails just in case of a fall. I haven't had any irritation from pedaling in them and they can help keep the cold out as winter approaches. POC makes the most comfortable protective equipment I have used.
Genuine Innovations Tubeless Tackle Kit $19.99 - This is a new kit that carries tire plugs and valve cores in a little tube. The tool is in the cap and can be preloaded for a quick repair. There is a valve core tool built into the bottom of the tube. You can get the plugs and tool for $8.99 but this kit stores them nice and the valve core wrench can be super handy out in the woods.
STOCKING STUFFERS
These items can cover a broad range of cycling necessities, from flat repair, to clothing, to nutrition, hydration, and so on... It is so much fun to get fun and creative with these gifts!
Below are some of the staples for stocking stuffer gifts, but we have a lot more cool items in the shop, too!
"THE BIG ONE"
NEW BIKE DAY! Make someone's dreams come true with a brand spanking new bike!
Below we have 2 awesome bikes being featured in this blog, that have been best sellers and are SO much fun to ride (there are a lot more bikes in the shop, but you'll have to come say hi to check them out). :)
The ROLL Sport (left picture) is A LOT of fun. Don't let the big tires fool you into thinking this is a "slow" bike. One ride on this thing will put a smile on your face. I like to think of the ROLL as a funcitonal beach cruiser style bike. It has gears, is not heavy, climbs very well, and is quite comfortable. The disc brakes offer peace of mind with their modulation and power, and are also low maintenance. The frame comes in a straight top tube design and a low entry design. We are big fans of both!
- ROLL Sport $550.00
The Stumpjumper Expert 29/6Fattie (right picture) will bring your trail riding to the next level! Trail Geometry Carbon frame, carbon wheels, SRAM 12speed Eagle drivetrain, Guide R brakes, Dropper Seat Post, FOX 34 Performance Fork, and RockShox RT3 Shock... What more could you ask for?!
The Stumpjumper has been one of our favorite mountain bikes at Rocktown. The riding here is technical, with a lot of climbing and descending. The Stumpjumper can do it all! If you don't belive us, just ask Kelly. She raced the SM100 on one in 2016 and placed in the top 10 women (and had a blast on it the entire time)! It has also been rated the #1 Trail Bike of 2017 for Singletracks.com readers!
- Stumpjumper Expert 29/6Fattie - $4,400
*S-Card Financing is available with 0% Interest for 12 months!
Roll Sport
Stumpjumper Expert 29/6Fattie
STAY WARM!
It's cold outside! But don't let that stop anyone from riding! We have a variety of Cold Weather Gear, and a handy Guide, to help you find the perfect piece of clothing.
Great cold weather staples at Rocktown are:
- Element 1.0 and 2.0 Jackets
- Therminal Arm Warmers
- Therminal Knee Warmers
- Element 1.5 Shoe Covers
- Element 3.0 Gloves
- Deflect Gloves
These are a few of the items you will see the Rocktown Staff & friends wearing on those chillier days.
ON-THE-GO
Do you commute, not use a car, bike pack, or go on all sorts of adventures by bike? These items will take your travel by bike life to the next level!
These bags and gear are awesome!! The backpacks, Burra Burra bags, and shoes are all SUPER water resistant. We have had several customers use these bags with great success for bikepacking in places like the Allegheny Passage and Blue Ridge Parkway.
The Burra Burra Stabilizer Seat Bag and Frame Bag are offered in two and three different sizes (20L and 10L for the Seat Bag, and 8L, 5L, and 3L for the Frame Bag). I've never been more impressed with and adventure specific seat bag than the Burra Burra Stabilizer Seat Bag. It has three different places of attachment, so there is no flopping or sliding around as you ride. It offers plenty of storage, and the buckles keep everything packed together well.
The Specialized Skitch shoes are nice for commuting and being able to walk. The toe is waterproof, and the sole is a sticky rubber so it grips pedals well. The cork insole offers some nice support as well.
Lights are a huge part of riding, especially if you are commuting or adventuring in the dark. If you need more descriptions on our lights, see the Chris' Favorite Things section of this blog (above). Be seen and be safe!
- Burra Burra Stabilizer Seat Bag 20L $140.00, 10L $130.00
- Burra Burra Frame Pack 8L $110.00, 5L $100.00, 3L $90.00
- Top Tube Pack $50.00
- Base Miles Storm Proof Pack $175.00
- Featherweight Back Pack $130.0
- Specialized Skitch Shoes $95.00
We hope you have enjoyed this Gift Guide, and found it helpful! If you have any other questions or would like to check out the items we featured, stop on by! We look forward to seeing you all in the shop, around town, and on bikes this season. And don't forget, our Rocktown Holiday Party is December 8th, starting at 6pm, here at the shop. Come join us for a good time!
Happy Holidays! - Chris, Kelly, Adam, Ryan, and Nate

Cold Weather Gear
The cooler temps are here, which can sometimes lead to confusion about what to wear for your next ride. Here are some helpful tips to keep you from getting too cold or too hot next time you roll out the door!
Cold weather can leave many cyclists wondering what to wear. Dress with too few layers, and you'll find yourself shivering for your whole ride, dress with too many, and you might as well be sitting in a sauna.
To help with figuring out what to wear as temperatures change towards the cooler side, we have made a winter clothing guide.
We have categorized our Winter Clothing into 3 Categories. Not everyone is affected by temperature the same way, so I didn't want to get too specific with actual temperatures. To give an example, I am someone whose hands easily get hot while I'm riding, but Chris gets cold hands quite easily. So, if we are both riding in 38degrees, I will probably have a lighter weight glove on than Chris because, otherwise, my gloves would be soaked with sweat halfway through the ride (not a great feeling).
The Categories are as follows:
- Cold - You feel like you might want a few layers, but not too many because it might warm up, or you might overheat easily at this temperature; having some skin exposed might be ok. It is helpful if the layers are easily pack-able into jersey pockets
- Very Cold - More likely than not you don't want much skin exposed, but you don't need to be layered like Ralphie's brother in "A Christmas Story." You might start to mix in some of the heavier weight clothing.
- Extremely Cold - Full on, "it is COLD, and it's going to stay cold; there's no way I can overheat in this temperature." You will most likely want the heavier weight/warmest level of clothing.
Each of these categories is meant to give you a few examples of how to layer, and you can give it your personal touch as you start to figure out what works for you. I've found myself with a mixture of wearing heavy and lightweight clothing on several rides so far this Fall.
Where to start:
I think the most important part of your apparel for cooler temps is your base layer. What type of fabric is sitting directly against your skin and how will it affect you in the temperature you are riding in?
My go-to base layer is usually some sort of short or long-sleeve shirt that has moisture-wicking properties. "Moisture-wicking" means the shirt will pull your sweat off of your skin and evaporate easily, thus preventing you from becoming soaking wet in your own sweat while cold air blasts against you and freezes your butt off.
A base layer (the fuchsia long sleeve) should wick away sweat and dry quickly so you don't have cold wet fabric against your skin.
COLD
This category encompasses rides that might have temperature changes (Ex: start early in the morning and ride into warmer temps as the sun climbs), or the temps are sitting right around where you would like a bit of assurance that you won't get chilled.
This temperature range is where having clothing that packs away into jersey/jacket pockets is nice. You can de-layer and layer back up as necessary with ease. Versatility is key.
Suggested Clothing (pick and choose what works for you):
- Standard kit
- Arm warmers
- Knee warmers
- Jacket (one that turns into a vest is always a nice versatile piece)
- Lighter-weight to mid weight glove
- Toe covers
- Shoe covers
- Neck gator


Clothing Pictured for COLD weather gear:
- SL Pro Kit
- Therminal Arm Warmers
- Therminal Knee Warmers
- Deflect Hybrid Jacket
- Element 1.5 Toe Covers
- Element 1.5 Shoe Covers
- Drirelease Merino Neck Gator
- Mesta Wool Liners (Gloves)
VERY COLD
This is where your thoughts start to go to, "Oh man, it's really beginning to feel like Winter." There's a crisp, snappy, cold feeling in the air that makes you more aware of the change in season. It means you need some warmer layers if you're going to enjoy your bike rides. I think this can be the most challenging temperature category to dress for because it is easy to overdress. If you're new to winter clothing, it might take you a few rides to figure out what works for you.
The importance of a proper base layer becomes more apparent here. You are going to sweat, even in the cooler temperatures. If you do not have a material against your skin that wicks away that sweat, then it will be sitting there cold - making your body work harder to stay warm. If your body is working harder to stay warm, then your energy is not being used efficiently and you'll find yourself shivering cold and unhappy fairly early on in your winter ride.
Wearing a proper base layer with a midweight jacket is an efficient way to keep warm and not overheat. Keeping your core warm, and covering your legs and extremities properly will ensure better blood flow and thus, better performance.
Suggested Clothing (pick and choose what works for you):
- Base layer shirt
- Standard kit
- Jacket with midweight insulation; a cycling specific jacket makes storing ride necessities easy
- Tights or knee warmers depending on your preference
- Mid-weight gloves, maybe some glove liners as well
- Neck Gator
- Shoe Covers
- Wool-blend socks
- Ear warmer or hat
Clothing pictured (above and to the right):
- Base Layer
- SL Pro Kit
- Therminal Knee Warmers
- Therminal Tights (no chamois, great for running as well!)
- Element 1.0, 1.5, 2.0 Gloves
- Deflect 1.0 Jacket
- Element Shoe Covers
- Deflect H20 Shoe Covers (heavier weight than Elements)
- Therminal Hat
- Drirelease Merino Neck Gator
EXTREMELY COLD
Adding a few more layers, and increasing the type of insulation in the clothing, will help you out in this temperature category. In addition to a base layer, jersey, and highly insulating jacket, you'll want to add some type of head layer, be it ear warmers, a hat, or balaclava.
In this temperature, your feet and hands are at a higher risk of becoming very, very cold; the possibility of them going numb can be high. For feet, a winter style cycling shoe, like the Defroster, is recommended, or wearing toe warmers in shoes, with heavy weight socks and heavy-duty shoe covers. The Element 3.0 gloves are my most recommended glove for this category - they are warm, and don't make your hands sweat. On these rides, I'll usually also have a pair of glove liners with me as well in case I feel like one more layer is necessary.
In the pictures below, Connor is dressed in probably close to the the very extreme end of the "Extremely Cold" clothing options, although there are always ways to add more layers if necessary.
On top of his base layer, standard SL Pro kit, and wool socks, Connor is wearing the following:
- Element 2.0 Jacket (Can also change into a vest)
- Therminal Tights
- Defroster Shoes
- Element 1.5 Windstopper Balaclava
- Insulator Mitts (on the bike, these things are like sleeping bags for your hands!)

:)
Suggested clothing options (pick and choose what works for you):
- Standard Kit
- Base Layer
- Therminal Tights
- Heavy weight/high insulation gloves
- Bar/Insulator Mitts
- Heavy weight/high insulation jacket
- Hat/Balaclava
- Heavy weight shoe covers or Winter cycling shoes
- Wool blend socks
Clothing Pictured (to the left):
- Therminal Tights
- Therminal Hat
- SL Pro Jersey
- Element 2.0 Jacket
- Element 2.0 and 3.0 Gloves
- Deflect H2O Shoe Covers
WET & COLD WEATHER
For those instances when there might be some precipitation, or you're just someone that gets out and rides no matter what the weather and temperature, here is some cycling gear that will help you stay warm and dry.
The Deflect H2O jacket has a woven fabric that is wind and water-resistant and highly breathable. The micro-fleece dots provide airflow and never leave your skin feeling damp or clammy!
Rain Clothing pictured:
- Deflect H2O Jacket
- Deflect H2O Shoe Covers
- Deflect H2O Gloves
- Therminal Hat
- Therminal Knee Warmers
- SL Pro Kit
- Base Layer
Big thanks to Lindsey Carpenter and Connor Bell for helping us out with this blog! :)
Road bike Geometry, "Endurance" vs. "Race" and Ride Impressions and Preferences
We ride a lot of different bikes in the shop world: our personal fleet (which seems to always be changing), test ride bikes at demo events, and customer bikes after a repair. There are different sizes, fit characteristics, and handling. Even in a category defined as 'road' we have endurance, race, gravel, cx race, touring, light touring, and some others (singlespeed cross' anyone?).
I want to cut through the fit differences and what makes bikes handle differently, as well as some key points I think are very important to overall ride enjoyment.
Lately, endurance road bikes have been so very popular. Due to some more favorable handling characteristics, better ride quality on our variable surfaces, and geometry that works, or is set up for what most folks would prefer, we see a lot of this type of bike today. The flip-side to that is that pretty much any bike in the correct size for the rider, can be set up in the position that the rider prefers. So even though we see bikes on the shop floor that may be more comfortable by default to most folks, they can still be set up more aggressively for the rider looking for that position, but perhaps wanting the handling, vibration absorbing properties, or tire clearance of the endurance model.
Kelly doodle :)
To clarify what we're talking about I want to describe the two most important numbers to bike fit, stack and reach. Stack is the distance from the front axle to the lowest point that a stem (the part that holds on the handlebar) can sit and determines the front end height of the bike. Reach is the distance horizontally from the center of the bottom bracket to the center of the headtube (see illustration). This determines the distance from where the rider is sitting to the handlebar. The reason reach is a much better number to use than top tube length, or horizontal top tube length, is because it is based off of the distance that the rider is offset from the crank, no matter what the seat tube angle.
The stack height is important because it sets the range in which the handlebar height can be easily adjusted. Sometimes people can think that it isn't possible to get a Roubaix or Diverge handlebar low enough, or a Tarmac handlebar high enough, even though they like the ride characteristics of that particular bike. This is not the case at all. These bikes can be set to accommodate most riders, as long as they are on the correct size frame, which is why it is really important to have a bike fit properly!
The driving forces for how a particular bike handles are a little more complicated than stack and reach, but I will cover the basics. The headtube/steering tube angle, fork offset, and chainstay length all contribute to the handling, with an honorable mention to reach again. The chainstay is the tube that connects the bottom bracket and rear axle on the frame (see illustration). For a while chainstays had been growing in length, especially when the 29er mountain bikes were new to the scene. To fit the larger wheel and tire, manufacturers were lengthening the chainstays and making the headtubes steeper to make up for the sluggish handling the early 29ers exhibited. As companies were finding value in creating shorter stays, they were able to decrease the steering angle again and create stable, yet snappy bikes. Reach comes into play is when a longer top tube is employed in conjunction with a shorter stem. This will make the handling snappier, yet still have the same headtube angle, which is handy for keeping the wheelbase as short as possible (so you can steer around things well). Fork offset is a little more complicated. Fork offset is the distance that the hub axle is offset from the center of the steering axis. Small changes here can make huge differences in the bike's demeanor. Some companies also use this to eek out a bit more foot clearance for small riders. More offset will decrease the 'trail' of the bike and less offset will increase trail. This changes how the bike reacts to your steering input. It can be similarly altered with headtube angle, but offset will change how the steering feels as you turn the handlebar more.
I use mountain bikes as examples as they have seen the biggest changes lately, but gravel bikes have evolved from the cyclocross bikes we were all using in the past to get road bikes with increased tire clearance. The cyclocross bikes weren't bad for most of our purposes, but they also had higher bottom brackets, different steering angles, fork offset, and stack heights than most riders would want, along with longer chainstays. Many gravel bikes now have road geometry with massive tire clearance, which is more fun on out pavement, gravel, and forest roads!
All of these differences may seem overwhelming, but it ends up being a good thing with all of the choices we have today, as riders can get the exact bike they want, instead of endlessly trying to make another style suit their purpose. We love talking about all of the possibilities and differences with folks everyday, so please stop by if you want to learn more!
-Chris

My Favorite Sport of the Fall Season
I competed in my first cyclocross race on a whim. In December of 2013, Chris mentioned that this event called Capital Cross was happening just outside of DC, and that even though I didn't own a cyclocross bike, I could do it on my mountain bike. I was super stoked to try something new.

My first CX race was quite snowy!
A few days before the race, it became obvious that a snow storm was heading our way. But the race was still going on, and so long as the roads weren't shut down, I was going!
Many, many inches of snow fell as we made our way up to Reston, arriving at the venue with only 25 minutes to spare until my start time!
I was a bit nervous when I noticed I was the only woman there on a mountain bike, but that all disappeared once we started. It was clear, given the weather, the ground conditions, and the layout of the course, that having a mountain bike was an advantage for the day. What was also awesome about being on the mountain bike was how many more people were cheering for me, because of my bike. People were shouting, "YEAH, mountain biker!" I was hooked.
The heckling and cheering at cyclocross races is awesome. I think it's one of the things that I like most about these events.
Cyclocross courses are short; I think the longest course I've ever been on was just 1.8 miles. You ride laps on this course for a certain allotment of time, and within the course are obstacles you can jump over with your bike, or hop off your bike and run over. With the race area being so small (relatively), you end up with a ton of people being able to cheer on racers almost everywhere on the course. "Heckling" is more about fun creative cheering than anything else. Everyone on the sidelines is so amped, and there's so much energy, and sometimes there are costumes, or beer handups (for the age appropriate) or snack hand-ups....
Cyclocross is a species of its own in the cycling event world, and I love it. I love the varied terrain, ride in the mud no matter what, pedal as hard as you can for an hour race scene.
Cyclocross is also one of the most welcoming race atmospheres I've ever been a part of. I think it's played a huge part in increasing the number of women that ride bikes and race, and I think it's helped cycling communities and groups band together to put on a good time in their home town. I know that's been the goal for the Rocktown Cyclocross Festival that we've put on the last few years. Come have fun, race, heckle, and hang out with a bunch of friends that ride bikes! The Rocktown Cyclocross Festival will be September 17th, this year. I know registration is up, and more details will be announced as we get closer to race date. I hope to see you all out there!
- Kelly
All smiles at Rocktown CX 2015 :)

2017 MTB Nationals
Mountain Bike Nationals were in Snowshoe, WV, this year!
Pre-Race:
I had planned on racing Mountain Bike Nationals since I heard about the location about a year ago. I heard it was at Snowshoe and if a National event is within 5 hours I will probably go. Last time I went to MTBNats it was up at Bear Creek Resort near Trexlertown, PA. The trails were rocky and rooty so I loved it. I knew Snowshoe had roots and rocks and that a lot of the time they are wet. When conditions get rough I tend to thrive (except for cold).
There are five disciplines that one can compete in at nationals. Those include Cross Country (XC), Short Track Cross Country (STXC), Dual Slalom (DS), Downhill (DH), and Enduro (ED). I would love to do all five but the expense was too much and the schedule would have been hectic (maybe another year). I decided to pick two and ended up registering for XC and Enduro. I have a long history of XC racing and was 5th at Nationals after a back row start a few years back. Enduro is a new thing for me. My only experience previously had been Tour de Burg and the Massanutten Hoo-Ha Enduro. I didn't know how it was going to go down at Snowshoe but I was excited.
For the XC race I chose to take a Specialized Epic dual suspension mountain bike with 100mm of travel front and rear. This bike is much lighter for when you have to race up climbs but can still handle rocky and twisty descents. The Enduro event only races the downhill sections with few uphill parts. For that I took my Specialized Enduro 29 which has 160mm of suspension front and 165mm in the rear. The longer travel smooths out rock gardens and takes the hit on bigger drops or jumps.
Race Week:
Snowshoe Resort is a two and a half hour drive from Harrisonburg. My wife and I loaded up baby Henry and all the equipment, and convoyed over the day before the Enduro with Lindsey Carpenter, who was also racing the Enduro. We checked in to our room at the mountain top village and Lindsey and I jumped on the bikes to go practice.
Enduro events go down like this: There are a number of stages each day of the event. Usually 4 stages over 1 day, but big events do 8 stages over 2 days. The riders will go out from a starting point in waves based on age or category (Pro vs. Amateur). We had to ride about 3 miles out to the start of stage 1 where we wait in line to race one at a time down the trail. At the end of the stage an official clocks your out and you follow arrows to the next stage. The stages are timed, but the "transitions" are not, and you are free to ride whatever pace as long as you complete that days stages by a designated cutoff time.
Thanks to a tip from a friend, Mr. Compton, we checked out stage 2 and found out it was a flowy lead-in to a rocky rooty chute straight down the mountain. The initial turn into the chute was intimidating to say the least. Lindsey and I made it down to the finish thinking that we may have a tough time come race day on that stage. We practiced a few more stages with Sue Haywood and Jason Cyr, who showed Lindsey and I some lines and gave us some intel for the event.
On day 1, we lined up at 2:45pm for the wave starts at 3pm. Here we go! Stage 1 was a pedally marsh of roots and slick bridges. It wasn't very steep, so you have to pedal constantly while navigating perpendicular lines to roots and trying not to slip of bridges. It was over in about 6 minutes. I had a clean run and found the FLOW.
We took the lift up and then started stage 2. It went better than I thought. Even though I spent about 30 seconds trying to get back into a pedal halfway down the run, I was able to keep the bike upright and only had a minor hickup with line choice that left me kayaking between 2 narrow trees. I was finished in about 3.5 minutes. We had to pedal up to the start of stage 3 but it wasn't long. I hadn't seen stage 3 but it was a fun ripper less steep than stage 2 and only half the time. I was surprised when I saw the results because this little trail was so much fun but it only took us 1.5 minutes.
We made our way to the lift for the second time and headed over the the Western Territories for our final run of the day. Stage 4 was a mix of the Pro Downhill course and other steep scary rock gardens and drops. They were scary before but when I raced this stage I didn't notice. I had a conservative but clean run other than a chain drop before the final rock garden. I kept composed, told the chain to get back on, and pedaled back up to speed.
Lindsey and I both lost time on Stage 4 probably do to our lack of experience with Snowshoe terrain. We got results later that night and saw we were in decent position going into the next day. I was 3rd in my category and only 34 seconds back and Lindsey was sitting 7th in the Pro race only 1 minute behind first and 20 seconds away from the podium.
Day 2 also started at 3pm. We did the same line up and wave releases. Stages 5 and 6 were known to be pedally, which is a great benefit to Lindsey and me. Stage 5 started on some almost double-wide single track with mud ruts and big rocks. When it is wider I have to analyze more trail and pick which line I am going to take. This is a big part of racing. On single track with one line, I don't have to choose, I just navigate the trail in front of me. When it is wide I can't always see all the options. I managed to make it through with a few foot downs and stayed on the bike, but felt like I was sprinting for 75% of it. Stage 6 was really pedally at the beginning and finished with a greasy rhythm section. We transitioned a while to stage 7 (another one we didn't get to practice). It started with a wooden platform and dropped into some whoops then turned into loamy s-turns with 29er wheel-eating holes through Ewok Village looking trees. It turned steep for the final section and I couldn't help but stay on the brakes a little more than I wanted. I had almost gone over the bars when my front wheel dropped into a hole. I bottomed my fork and braced with my arms at the last instant the wheel rolled out of the hole... phew. At this point in the day, I was moving fast but felt like I was barely holding on with the upper body fatigue. My arms hurt more than my legs. We took the lift up from 7 and headed over to the other side of the mountain for the final stage of the race. Stage 8 paralleled the Pro DH course but was mostly jump line and berms with one long high speed try-to-make-you-flat rock garden. Thanks to my experience on Creamy at Massanutten Bike Park I was now comfortable with jumping. I felt really good on this stage. I was conservative in the corners on the first half but let it go halfway down and charged to the finish. The work was finished.
Men's 30-39 Enduro Podium
The results didn't come until 2am due to some timing issues. I had made up the 34 seconds from the first day, and ended up taking first place. Lindsey moved up from 7th to 3rd and made the Pro podium.
Riding the roots in the XC race
Snowshoe terrain was the toughest we have ever ridden and we plan on heading out there to practice more before next year. Nationals will be at Snowshoe again in July 2018. The morning after the Enduro, I jumped on my "little" bike to line up for the XC race. I felt so tired, and didn't sleep from much waiting for the enduro results. With about 20 riders, I made it into the rooty woods section 9th and left in 4th. I maintained that position for the next 2.5 laps and earned another podium.
I had so much fun at Snowshoe with my family and friends. Thanks to my Rocktown Bikes team for helping me by taking up slack at the shop mid-summer so I can go play. Thanks to my wife for the freedom to train and compete while we raise our 6 month old son.
:)
Derailleurs - Helpful advice to keep your bike shifting happily
Learn about Kelly's love for derailleurs and also some helpful mechanic skills!
I love derailleurs. Derailleur adjustments are my favorite part of a bike tune-up. Without derailleurs, your bike would be a single-speed; and nothing against single-speeders, but I think that just makes for a sad time.
An improperly adjusted derailleur can ruin a ride, or stop a ride from even happening on what is probably the most beautiful day of the week. Because, let's be real, inconvenient things seem to have a knack for occurring on the best days of the week.
The purpose of this blog is to get you familiar with derailleurs so, should you find yourself at a moment in time where a shop mechanic is not available to help you out, you can get your bike shifting again (or at least well enough to get yourself home).
Even though there are mountain bike and road bike specific derailleurs, derailleurs usually all function in the same way. Varying designs may make derailleurs look unfamiliar between component brands, but if you get familiar with the general parts, you'll start to notice they all actually seem fairly similar.
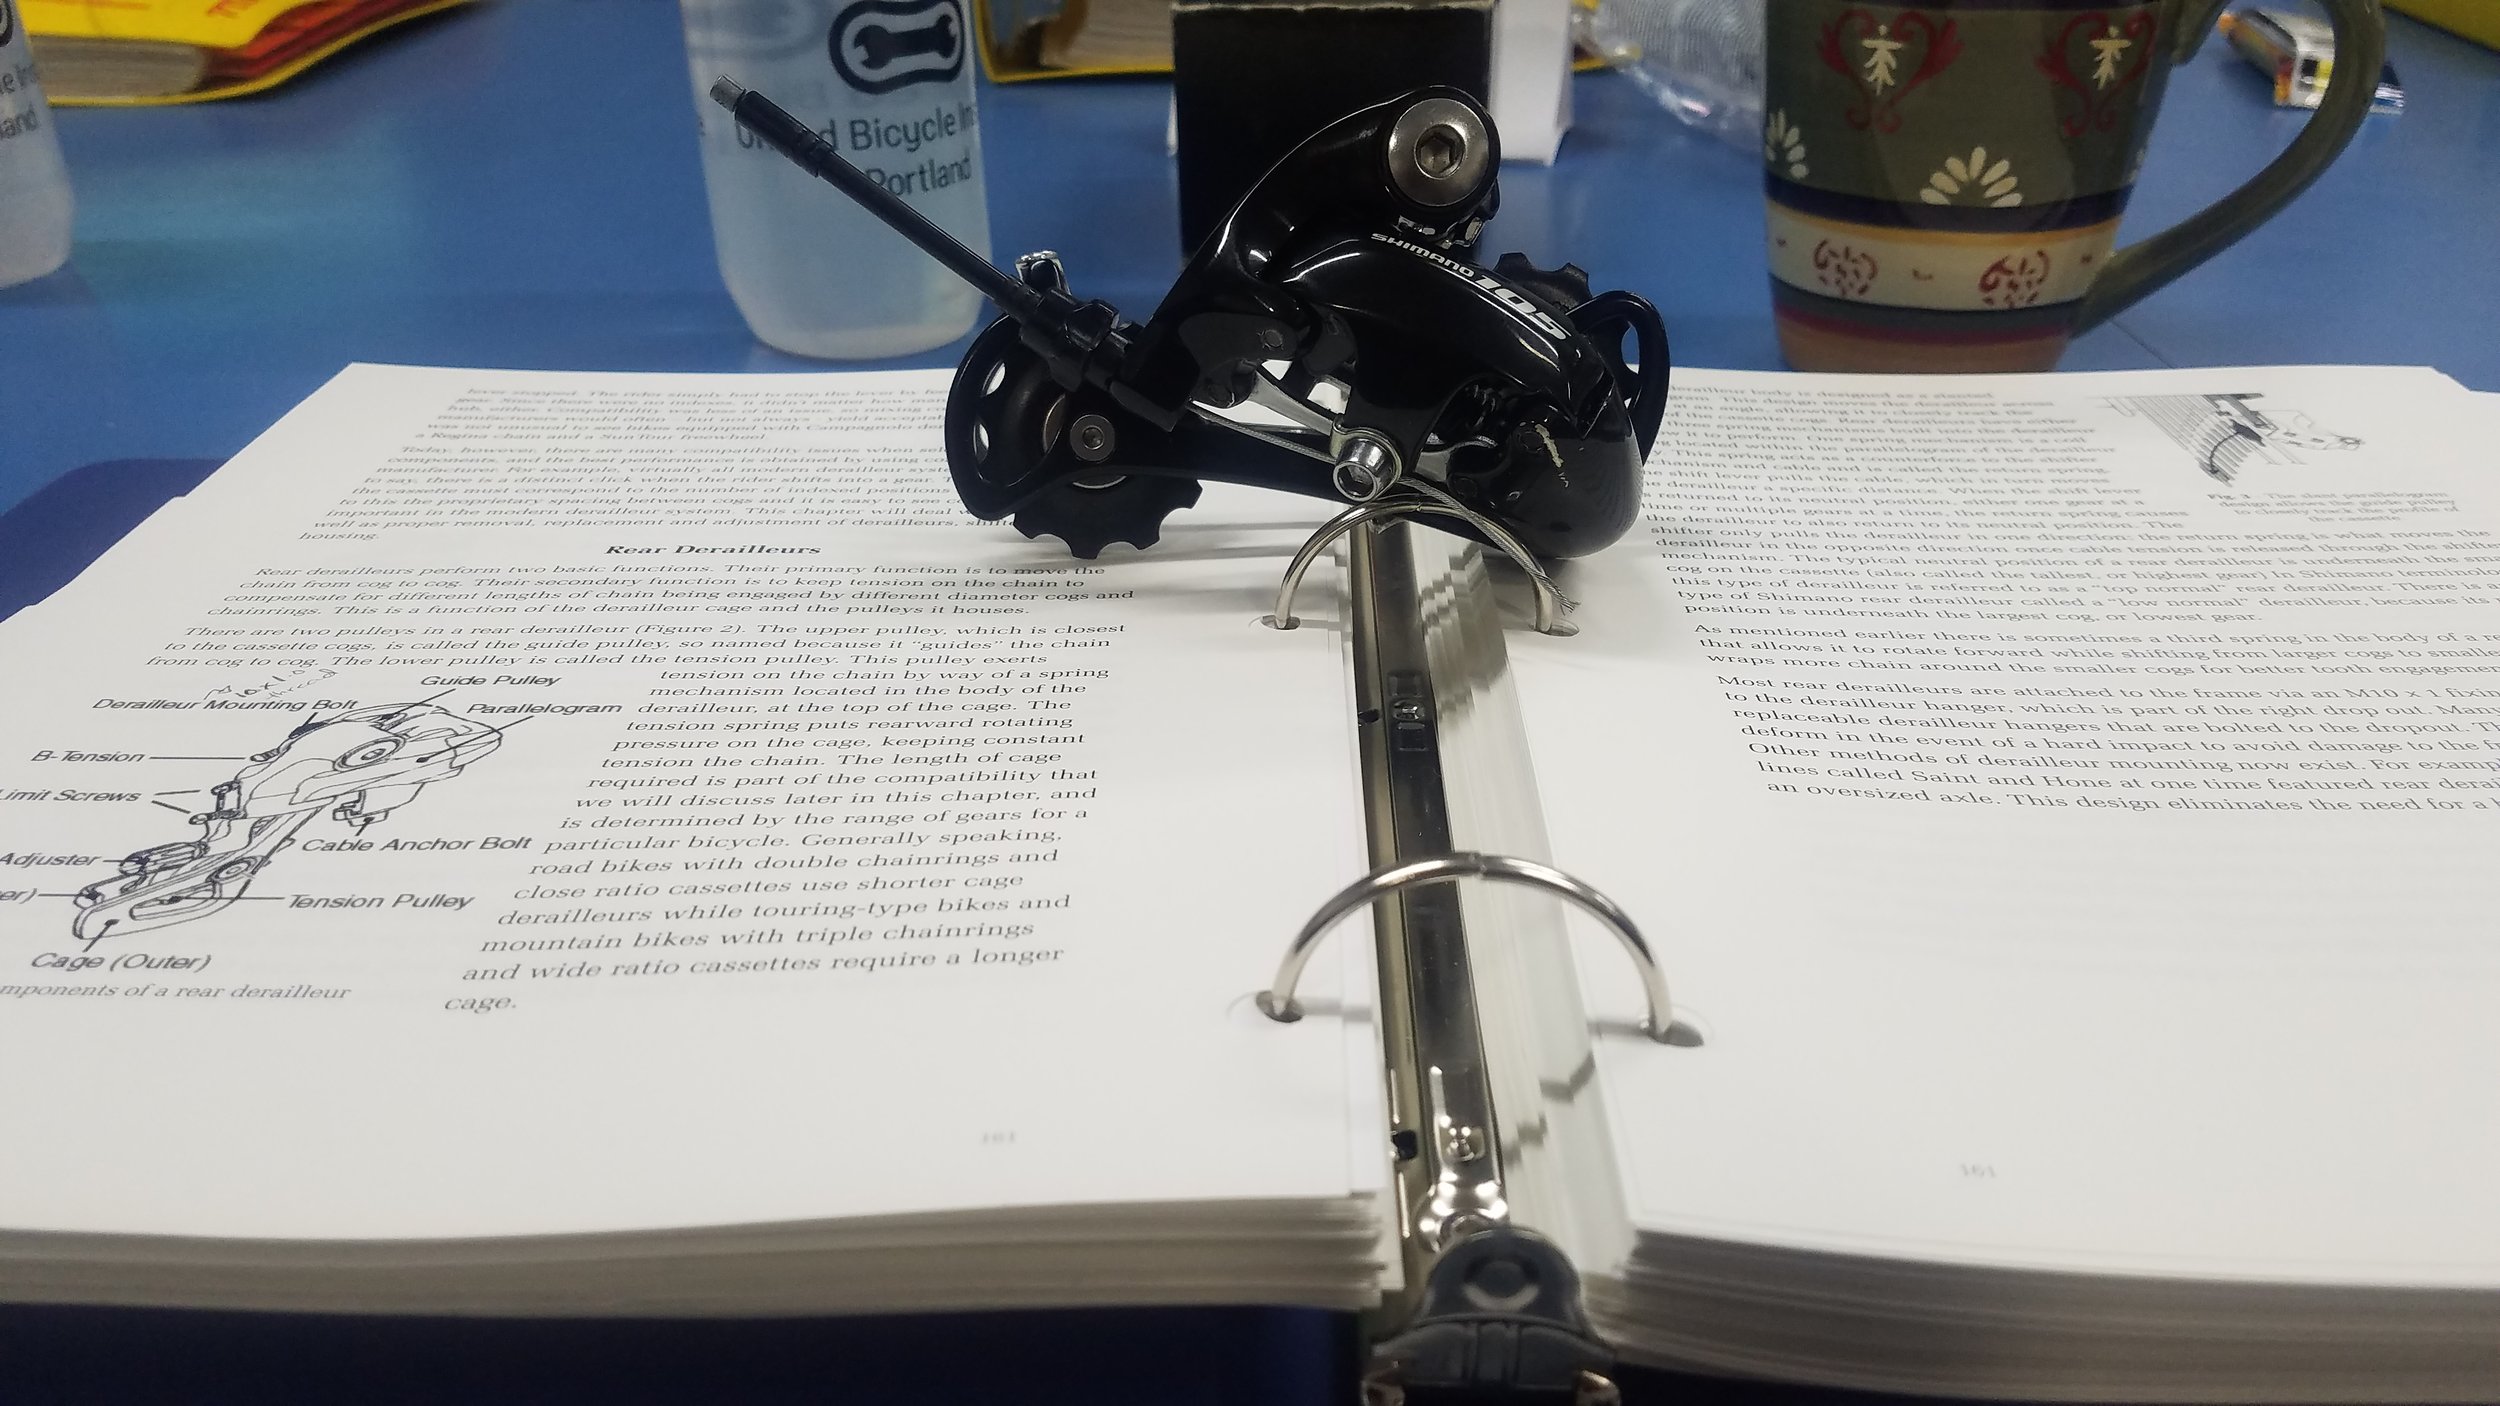
Most Rear Derailleurs will have the following:
- Mounting Bolt - this attaches the derailleur to the bicycle frame.
- Low Limit Screw - this limits the chain from shifting off of your largest cog and into your rear wheel
- High Limit Screw - adjusted to allow the chain to shift into the smallest cog, center chain placement relative to the smallest cog, and prevent chain from falling off and into the frame of the bicycle
- Cable Anchor Bolt - this is the bolt responsible for keeping the shift cable in place, it also is responsible for holding the cable tension.
- Derailleur Cage & Pulleys - Rear derailleurs contain two pulleys. A Tension pulley keeps tension on the chain as it moves through the drivetrain, and the Guide Pulley stays true to its name and guides the chain from cog to cog as you shift
- Barrel Adjuster - Sometimes found on the rear derailleur. If it's not on the rear derailleur, there will most likely be one placed on the rear shifter or in the shift housing. This is used for getting that last bit of cable tension adjustment that just isn't possible at the cable anchor bolt. Think of it as fine tuning your shift cable tension.
- B-Tension Screw - this screw is responsible for adjusting the tension the derailleur is placing on the chain; there are specific guidelines to follow for this adjustment based off of your type of rear derailleur. Guidelines can usually be found on manufacturer's websites (or you can ask one of us here at the shop) :)
Most front derailleurs will have these parts:
- Mounting Bolt - this attaches the derailleur to the bicycle frame. Height and angle adjustments occur here to properly line up the derailleur with you bike's chainrings
- Low Limit Screw - this limits the chain from shifting off of your little chainring and falling into your frame.
- High Limit Screw - adjusted to allow the chain to shift into the largest chainring without letting the chain overshift and falling off of the big chainring
- Cable Anchor Bolt - this is the bolt responsible for keeping the shift cable in place, it also is responsible for holding the cable tension.
- Derailleur Cage - There are Inner and Outer parts to this; the Inner Cage sits closer to the frame of the bicycle, the Outer Cage sits further away from the bicycle. The cage is responsible for physically moving the chain when shifting is engaged
- Barrel Adjuster - Not usually seen physically on the front derailleur of road bikes, but sometimes placed in the housing of the front shift cable or somewhere on the downtube of the frame. On mountain and hybrid bikes, it can usually be found on the front shifter. This is used for getting that last bit of cable tension adjustment that just isn't possible at the cable anchor bolt. Think of it as fine tuning your shift cable tension.
It probably seems like there are a lot of parts to try and remember. And you might be thinking, "There's no way I'll remember all of these things. How is this supposed to help me work on my bike?"
It will take a few times of trial and error to get derailleur adjustments right, but understanding some of the scenarios in which your derailleur isn't working will help you greatly.
Things that will cause shifting issues:
- Cable Tension (pobably the most observed issue):
- Cable is either too loose or too tight
- If your cable is not shifting into the big chainring in the front, or the largest cogs of your cassette (on the rear wheel), this can be an indicator that you do not have enough cable tension
- this can be adjusted with the barrel adjuster and/or physically pulling the cable tighter at the cable anchor bolt
- when adjusting the barrel adjuster, you'll know you are turning it to tighten the the cable by seeing the inner plastic piece emerging from the outer dial
- this can be adjusted with the barrel adjuster and/or physically pulling the cable tighter at the cable anchor bolt
- If your cable is not shifting down into your little ring in the front, or into your smaller cogs of your cassette, this can be an indication that your cable tension is too high
- this can be adjusted in the same ways as if your cable tension is too loose, except at the cable anchor bolt you will be letting in some slack in the cable tension, OR at the barrel adjuster you'll be turning the dial so the inner plastic piece winds back into the outer dial.
- Limit Screws are not properly adjusted:
- The High & Low limit screws prevent the derailleur from shifting the chain off the of the drivetrain and into the frame/wheel, or causing the chain to overshift off of the big chainring
- When the limits are not adjusted properly what is usually seen is chain-dropping or the derailleurs are unable to shift the chain into the large chainring/cogs.
- Derailleur Hanger is Bent (rear derailleur):
- The derailleur hanger is the piece that holds the rear derailleur to the bicycle frame. It is meant to fail first in the case of a crash to help prevent bending the derailleur
- If this is bent, the derailleur will be out of proper adjustment/alignment in relation to the cassette
- A bent derailleur is usually good for one session of bending it back (best done by a bicycle technician)
- If you're a mountain biker, taking an extra derailleur hanger (specific to your bicycle) out on the trails with you is usually a smart idea. It's more likely that you'll damage/bend a derailleur hanger on the trails than on the road; just more things in the trail to get flung up and hit your bike, as well as more opportunities to dump your bike if you're feeling rambunctious
- B-Tension not properly adjusted:
- because the B-Tension is so specific to the drivetrain, this should be already set up for you when you purchase a bike. However, sometimes things can happen, and the tension can come undone. Just a good thing to know if you cannot find issue with anything else wrong with your derailleur setup
- Derailleur itself is damaged or bent:
- Newer derailleurs have become burlier, and the mountain bike derailleurs seem to hold up to a decent amount of beating. However, a crash can ruin a derailleur. Front derailleurs can also become damaged or bent from shifting too hard into the big chainring; the cages will become splayed and then the limits get out of adjustment
Running through these scenarios as a checklist can help you (in most circumstances) figure out if and what is wrong with your derailleur and whether or not you want to attempt fixing it yourself, or have your friendly local bicycle technician run through and discus the issue with you and your bike.
I've made these drawings and descriptions into blog because when I first began working on bikes and completing these adjustments, I felt lost. I wished for a helpful picture to keep handy if I couldn't remember what screw did what or why the cable tension wasn't cooperating with me. I didn't always love doing derailleur adjustments. It took me a while to figure out the problem-solving matrix, and understand scenarios that can make derailleurs do crazy things. But now that I know these adjustments, I want to help others understand them and not feel nervous when they realize their bike isn't shifting properly all of a sudden. I hope that this is a helpful guide to anyone that reads it. Also, keep an eye out for our maintenance clinics by checking out our event page! We offer co-ed and women's only clinics!
- Kelly
*All pictures are by Kelly Paduch and may not be used without her express permission*

2017 Stumpjumper FSR Pro Carbon
BACKSTORY:
I guess I've technically been mountain biking for 5 years now. Looking back at where I started to where I am now in ability level sometimes astounds me and fills me with pride, and other times it frustrates me; I've felt like I should be better than I am.
A lot of this has come down to confidence. The mountain bike I started on in 2012, and the bikes I've been riding in the years after that, did not necessarily encourage my more cautious trail-side demeanor to try bigger moves and faster speeds.
This past August, not owning a mountain bike at the time, I was borrowing one of the shop's mountain bikes with only a bit of travel - preparing myself to use this in the Shenandoah Mountain 100. But one day, while out on the trails, my frustration with the combination of my personal riding style and the bike's riding style came to a head.
In that moment, I decided, "Nope! I am not riding this in the 100."
Enter: the 2017 Stumpjumper FSR Pro Carbon 29 I think my second or 3rd ride on this bike was actually the SM100. Let's just say this bike felt so fast I was really surprised by how quickly I was going down the mountains, without even trying. It felt like my riding had gone to 11, and I was having a lot of fun!
HOW DID I KNOW I WANTED THE STUMPJUMPER?
Our shop always keeps one in stock as a demo bike. Over the summer, it was available for me to ride on a day I decided to poach a stage at the always awesome Tour de Burg. We rode Death Star and Pond Knob. Both awesome descents. Both with a lot of climbing to reach each trail head. The Stumpjumper FSR performs well in climbing and descending. The riding here is technical both up and down; a bike that does well in both categories, and does not weigh a ton, is pretty much a requirement for overall enjoyment.
A lot of people I interact with in the shop are usually surprised to hear that our bike of choice is the Stumpjumper FSR. It has 150mm travel in the front and 135mm in the back; specs that would normally make a person wary of using it for an all-purpose mountain bike. But, Specialized has made the geometry of this bike so that its travel doesn't get in the way of performance. I have yet to find a bike that feels as efficient and fun as the Stumpjumper FSR for the trails here.
My Pro Carbon Stumpy came stock with an Ohlins STX single tube air shock. This shock features high and low speed compression adjustment as well as the traditional low speed rebound adjust. It also has an extra-volume reservoir, resulting in more control and plushness.
This shock feels AMAZING. The STX is very tunable to the rider that will be using it.
The shock also utilizes the "autosag" that is seen on other Specialized mountain bikes. Autosag makes achieving proper air pressure in the shock a breeze. Below, you'll find a small description of the Ohlins shock that will go into more detail.
This bike also comes stock with a Rock Shox Pike (a great fork). But, with what we had heard about the collaboration of Specialized and Ohlins in creating a new mtb fork, Chris thought I should maybe change out the stock fork. So when we put the order through for my bike, we put one other item on the order - an Ohlins RXF 34 29er Fork.
The RXF "was designed to be the gold standard in front-end suspension." My own personal impression? It's pretty golden. Rolling through rocks, drops, and any type of terrain thrown my way, this fork feels smooth as butter.
Having both Ohlins front and back suspension on the Stumpjumper is incredible. With all of its available tuning adjustments this bike feels like it was made specificaly for me.
OHLINS RXF 34 & 36 SHOCKS:
Illustration by Kelly
The RXF 34 and 36 Shocks are unique in that they have a completely new damper setup. The TTX damper in this fork is a twin tube design. This allows the rider to make adjustments to low and high speed compression independently from rebound adjustment. Thus, less air pressure is needed in the system, which also means the overall feel of the suspension is smoother, and the seals will last longer.
Low speed compression adjusts how the bike will feel when pedaling over small bumps and/or uphill. The low speed dial is the blue dial on top of the high speed compression dial. There are 5 clicks of adjustment here.
High speed compression comes into play for bigger, faster hits. It has 3 clicks of adjustment with the last click basically locking the fork out. This is the black dial that sits on top of the fork, directly under the blue low speed compression dial.
Rebound Adjustment is the gold dial found on the bottom of the fork. There are 25 clicks of adjustment, allowing for quite a broad range in damping. This is nice because it is an adjustment that can be very finely tuned to the rider.
Illustration by Kelly
The RXF 34 and 36 use a 3 Chamber Air Spring. It is an enclosed system with a Main Chamber, a Negative Chamber, and a Ramp-up Chamber. Air is pumped into the Main Chamber and the Ramp-up Chamber with pressure based on rider weight. The Ramp-up Chamber is found on the bottom of the fork, opposite the rebound adjust dial.
The Ramp-up Chamber is also a unique feature from Ohlins. It takes the place of spacer tokens that other forks utilize to change the spring compression curve - giving the rider infinite adjustment, and a suspension that is perfectly tuned to them.
One of my favorite specs of these forks is the One-piece Steer Crown Unit. In this unit there is no press-fit between the crown and steer tube, and it has a built in crown race. This eliminates any possibility of creaking and increases stiffness in the unit, offering a much improved riding experience. Ohlins claims it's 34mm chassis meets or exceeds other companies 35mm platforms (ex. Rockshox) and is on par with other's 36mm setups. It's difficult to objectively quantify this outside of a lab, but I haven't ridden any fork that feels as smooth under load.
OHLINS STX SHOCK:
Illustration by: Kelly
The Ohlins STX22 Air Shock offers the same performance as Ohlins' TTX Downhill Shock, minus the coil spring. This saves weight - the TTX weighs 450g plus the Spring, where the STX22 weighs in at 390g. This is the first time Ohlins has created an airsprung damper for mountain bikes. When Specialized and Ohlins started their shock collaboration, Ohlins brought its damper expertise and Specialized brought its AutoSag system to the project.
To set up the shock air pressure, use the schrader valve on the right side of the shock to pump it up to 250psi, make sure the lockout or high speed compression is all the way open (soft), press the Autosag valve on the left side (while rider is sitting on bike), and cycle the shock twice. The AutoSag system should put the shock at the perfect air pressure based off of the rider's weight. Then adjust compression and rebound accordingly.
The STX22 has Low Speed Rebound, Low Speed Compression, and High Speed Compression adjustments available to the rider. The Low Speed Compression (9 clicks) is the blue dial found on top of the black High Speed Compression dial (3 clicks). Low Speed Rebound (6 clicks) is the gold dial found towards the back of the shock.
The shock is able have either a progressive compression curve or a linear compression curve based on the number of volume reducers used by the rider.
OVERALL IMPRESSIONS:
The Stumpjumper FSR is a trail-eating machine.
It is FUN! I race on it, I take it to the bike park, and I enjoy riding every trail available. It does everything I could want a bike to do.
Our overall goal, when figuring out what bike is best for an individual, is based off of, "What do you like to do, and what do you hope to do?" My hope, when getting the Stumpy, was that it would help me gain confidence on the trails. It's done that, tenfold. This bike feels unstoppable and I feel pretty close to invincible.
Kelly's Stumpjumper FSR Pro Carbon 29 Setup:
- Frame: Fact 11 Carbon front and rear triangles
- Drivetrain: SRAM X1 Eagle
- Cassette: SRAM XG-1295, 12speed 10-50t
- Brakes: SRAM Guide RS; 200mm rotor front, 180mm rotor back
- Handlebar: Specialized Trail 25mm rise, 750mm, ESI Pink Chunky grips
- Seatpost: Command Post IRcc, 12 position micro-height adjustable
- Wheels: Stan's NoTubes Arch MK3
- Tires: Ground Control 2.3 Front, Renegade 2.3 Rear
- Fork: Ohlins RXF 34 29er
Some of My favorite Rides on this bike
*All Ohlins illustrations are by Kelly.*

Wheel Thoughts, Evaluations.
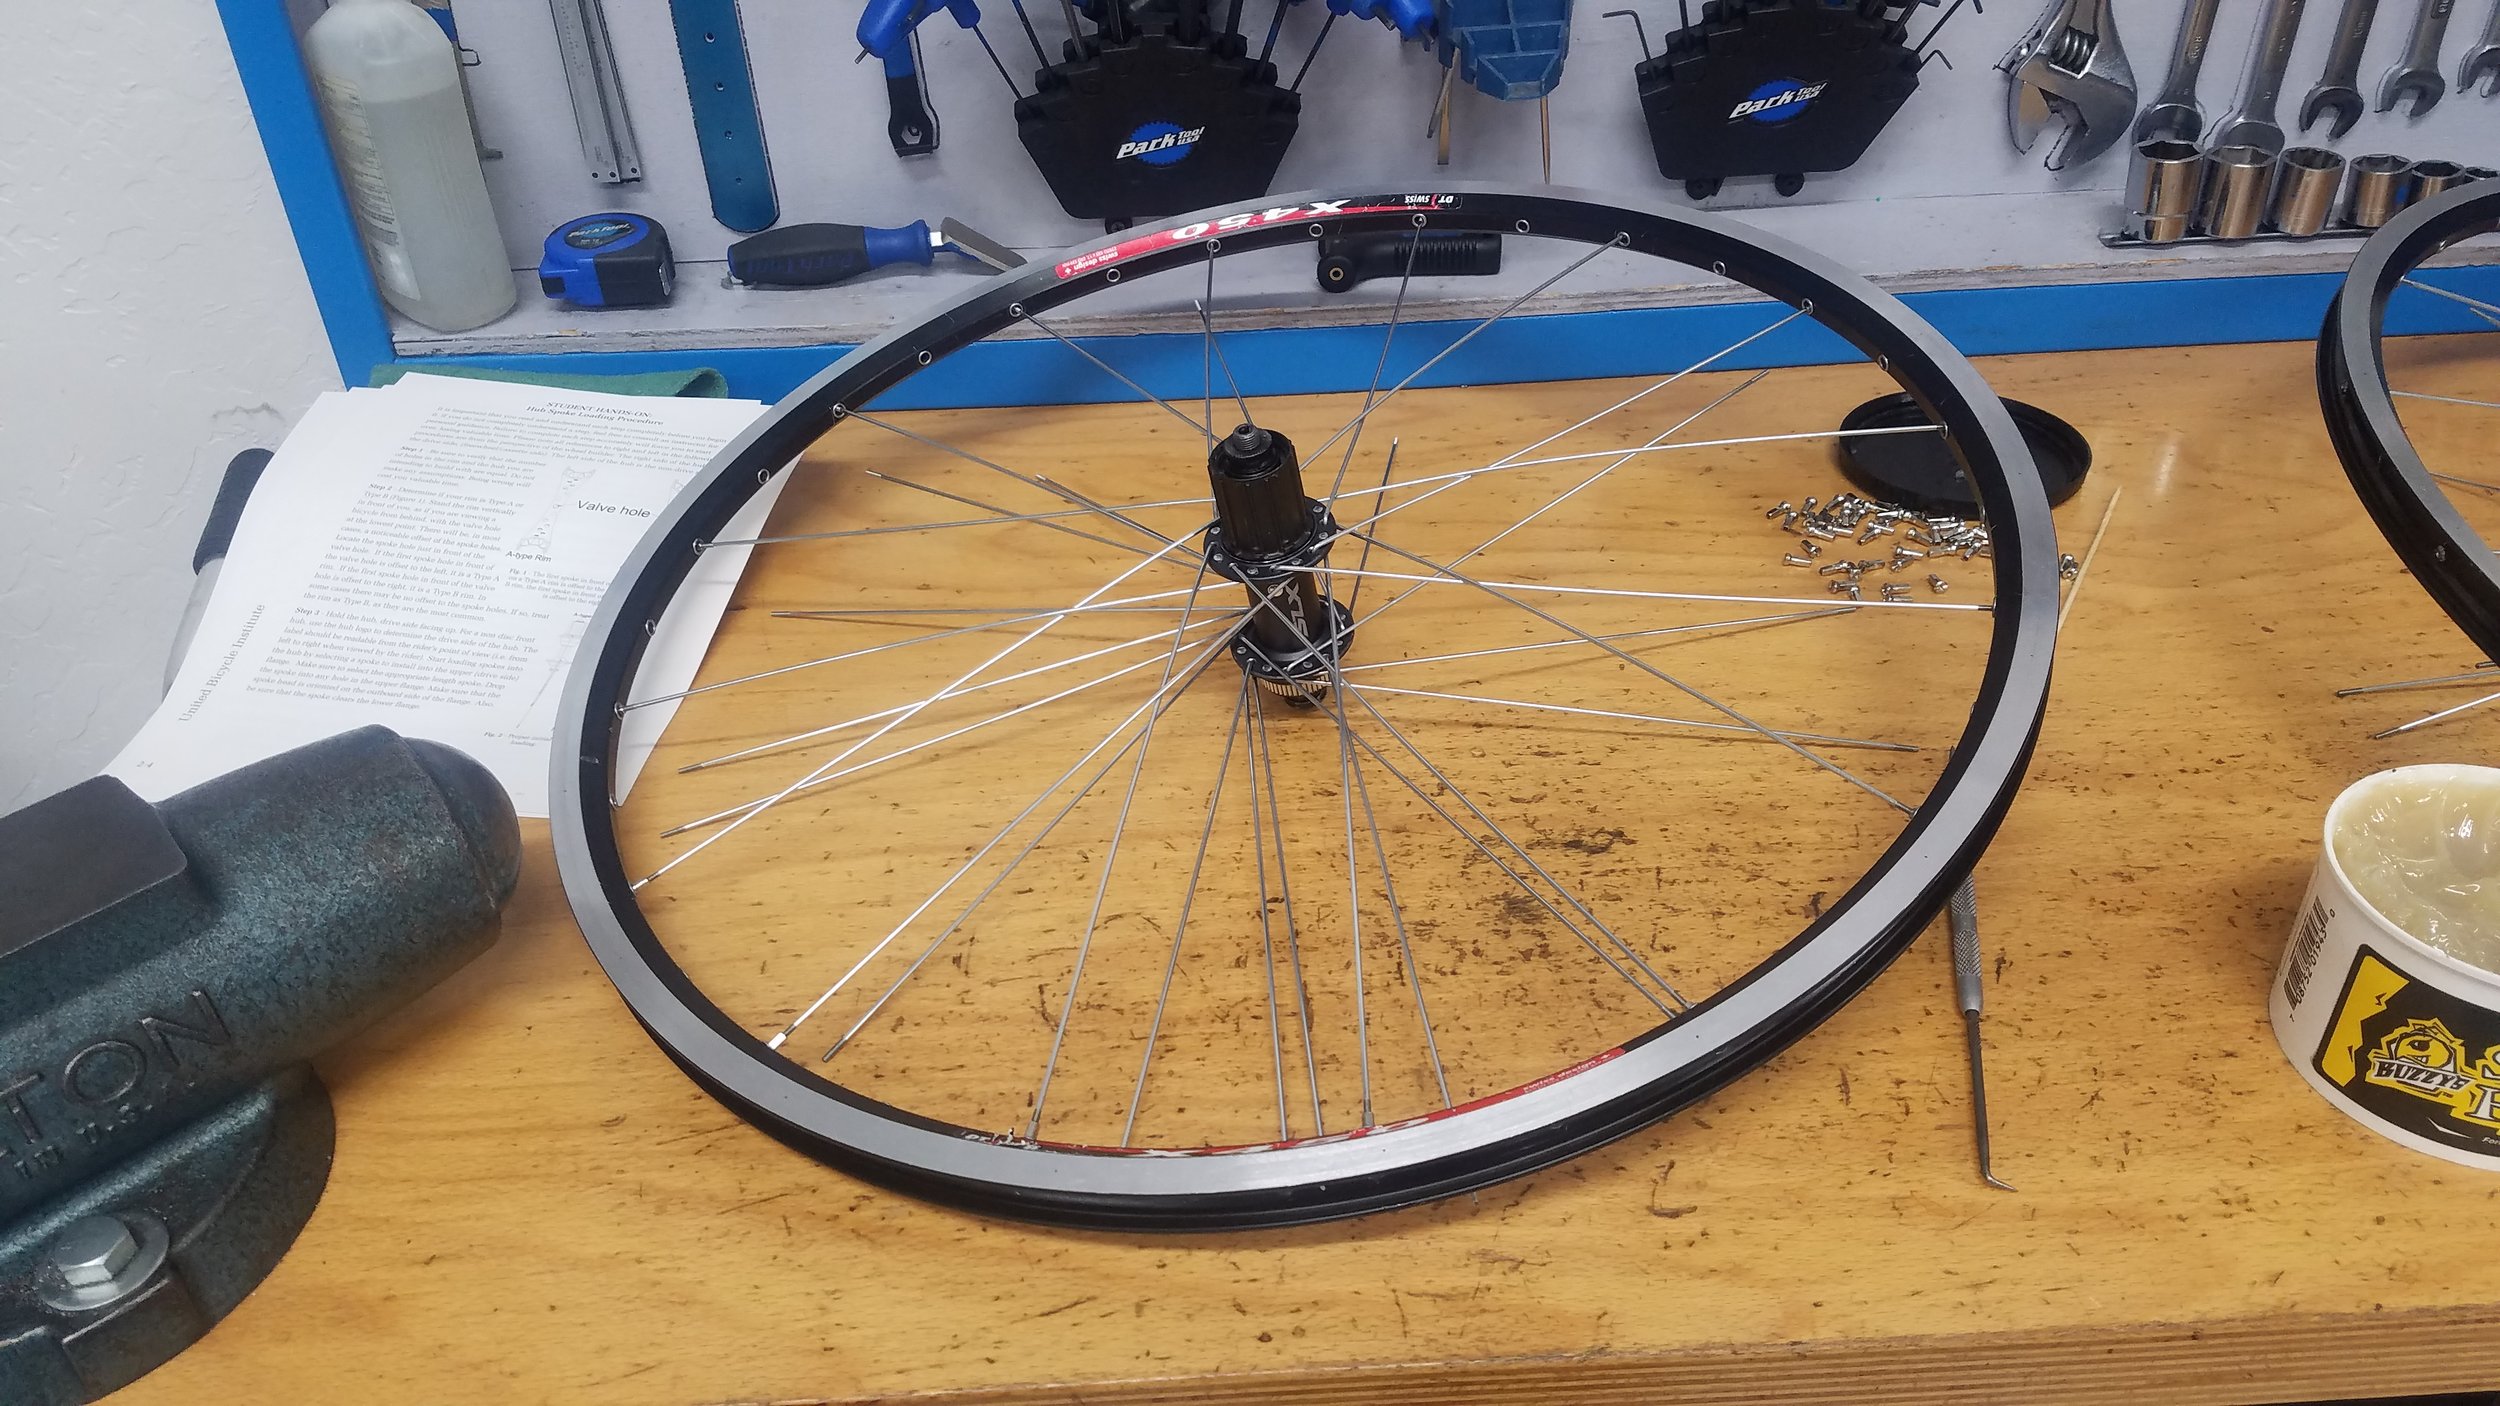
We spend a lot of time at the shop discussing wheel choices, and trying to find the best combinations of a rim, spokes, and hubs for riders other than ourselves as well.
Wheels are often much more than the sum of their parts. Knowing how a particular hub builds to a rim model, how equal the tension ends up being on both sides of the wheel, as well as how stiff the wheel feels are important factors. The other factors (still important) being dent resistance, hub engagement, hub service life, weight, spoke strength (both in building and abrasion resistance when contacting nature directly) parts availability, and the ability to adapt to newer standards all come into play.
At the shop, we usually talk with a customer for some time to figure out what they want and need out of their wheels, and build from there. I have a strong preference towards DT Swiss, as their parts just work, and speaking with them in Colorado is always an enlightening and fun time.
Luckily for us, Specialized builds many of their wheels around DT Swiss hubs, or DT hub internals. My favorite type of pre-built wheelset is one that uses hub drillings that aren't impossible to find, regular spokes, (straight pull or j-bend) steel, with a 1.8 or 2.0 threaded end), and a 2:1 lacing ratio or some other way of keeping the drive and non-drive tensions equal or close to it.
The 2:1 style of lacing is very effective because most wheels today have what is called dish. Dish is another way of describing the hub offset compared to the rim. This is because of disc brakes and the freehub body. To create a dishless wheel our hubs would have to be considerably wider than would make sense with modern bike geometries. What a 2:1 pattern does is put 2 spokes on the driveside to 1 on the non-driveside. Because the driveside spokes are shorter, they often hold much more of the load than the non-drive. What we then end up with is a 32 spoke wheel in which the 16 driveside spokes are supporting much more than the 16 non-drive spokes. One way to get around this is to shorten the non-drive spokes and use fewer of them, thus creating a wheel with 24 or 28 spokes that has a much more evenly distributed load.
Another helpful way to do this is to use a hub with offset flanges, or asymmetrical flanges, and a rim with asymmetrical drilling. These are all ways to use fewer spokes, or get more strength out of the build. Some hubs are notoriously uneven tension builds (older Powertap and current Shimano road hubs come to mind).
Wheels get most of their strength from the rim itself, with the spokes playing a supporting role. If one builds a wheel with a flimsy rim and heavy, strong spokes it will hold up for a time, but the spokes will fail more quickly, and the rim will dent and bend more easily than a comparably weighted wheelset with lighter spokes and a heavier rim. This is due to the Fatigue Limit of the components. Steel (and titanium) spokes for example, can withstand a theoretically infinite number of cycles if the cycle is kept under a certain deflection or amplitude. Every wheel flexes as it rolls with a rider, and is subject to additional forces when the rider pedals or turns the bicycle. If the wheel is under-built for the application, the spokes will be subject to far more deflection and will result in breaking of the spokes; often many break within a few hundred miles of each other because they have all reached their fatigue limit at relatively the same time.
We see similar failures with aluminum spokes, but often much sooner as aluminum spokes lack the elasticity and fatigue life of steel and titanium spokes. The aluminum alloys used in spokes will fail eventually no matter how little deflection they come under, and the lifespan shortens as the deflection becomes greater, as seen with a detensioned wheel or a wheel that is under-built for the use. Aluminum has benefits as well, though, and forged aluminum spokes can also help with reliability, helping to create a stiff, strong spoke. Both aluminum and titanium, great materials for so many applications on the bike and beyond, are less than ideal for spokes because of the nature of wheels. Steel and carbon make great spoke materials with the latter not being used much due to cost and complexity. Titanium alloys generally have a lower stiffness and the fatigue limitation of aluminum alloys create issues as well.
There is a lot more that I won't go into here about how heat treating, forging, and shaping processes greatly affect how these materials are used to achieve very specific component specific goals, but that would be a huge article in itself.
It's interesting to see how different riders test the limits of their wheels too. Some people manage to hit spokes a lot, resulting in failure due to abrasion from rocks and such. Some dent the rims from running low pressure, others ride through (all the mud water?) a lot of water and mud with the result of hub bearings needing frequent attention.
So along with my preferences:
DT 350 hubs- These things use the Star Ratchet design, have the best sealing of any hub I've ever used (same for any other DT) standard beaings, build well tensioned wheels, are available in like 100 different types, and they are light too! The one drawback is that DT is still putting Star Ratchet in them with 20 degree engagement, which isn't what most riders want nowadays. The good news is 10 degree and 6.7 degree upgrade kits are available for $100
DT Rims- Good tubeless bead, asymmetrical offerings, welded offerings (stronger than other methods of construction) and many different widths. Quality control has always been good.
WTB Rims- Good tubeless bead, asymmetrical offerings, great choices for Harrisonburg riding and great pricing. Quality Control has always been good.
Stan's No Tubes Rims- Lacking in Quality Control in years past, the new, welded rims seem to have bumped up Stan's game big time. Prices are close to the DT options so difficult decision with the Stan's.
Spokes and nipples: This is pretty open as DT, Sapim, and Wheelsmith make some great stuff. Options include sweet anodized nipples and ones that make it easier to true the wheel.
The 2 wheelsets we've been really liking lately are the Roval Traverse, which come stock on many of our bikes and are a $600 set. They use a less expensive DT hub internal with 15 degree engagement, and easily convertible parts. 30mm internal rim width, and DT revolution straight pull spokes built with a 2:1 front and equal tension rear design. It's a light trail wheelset that we've had a lot of success with. Some folks have broken spokes from abrasion but that's to be expected and will happen with most spokes if they encounter those types of impact.
The other is our demo wheelsets (we have them in boost and non-boost). The boost set is currently on our Stumpjumper FSR demo bike. These have DT 350 74 point (6.7 degree engagement) and carbon 30mm internal rims. They are really stiff, and really light at 1,550g.
Compared to the Control SL wheels on my Epic the Traverse SL are 7mm wider and noticeably stiffer. It is difficult to discern whether stiffness comes from the rim being wider and better supporting the tire, or just a beefier build; but they feel great. The resins used in the Traverse and Control carbon wheels are also more impact resistant over the Control SL rim. Not that I've had any issues with some hard hits on the Control SL, but it gives an extra piece of mind for folks.

Attending United Bicycle Institute
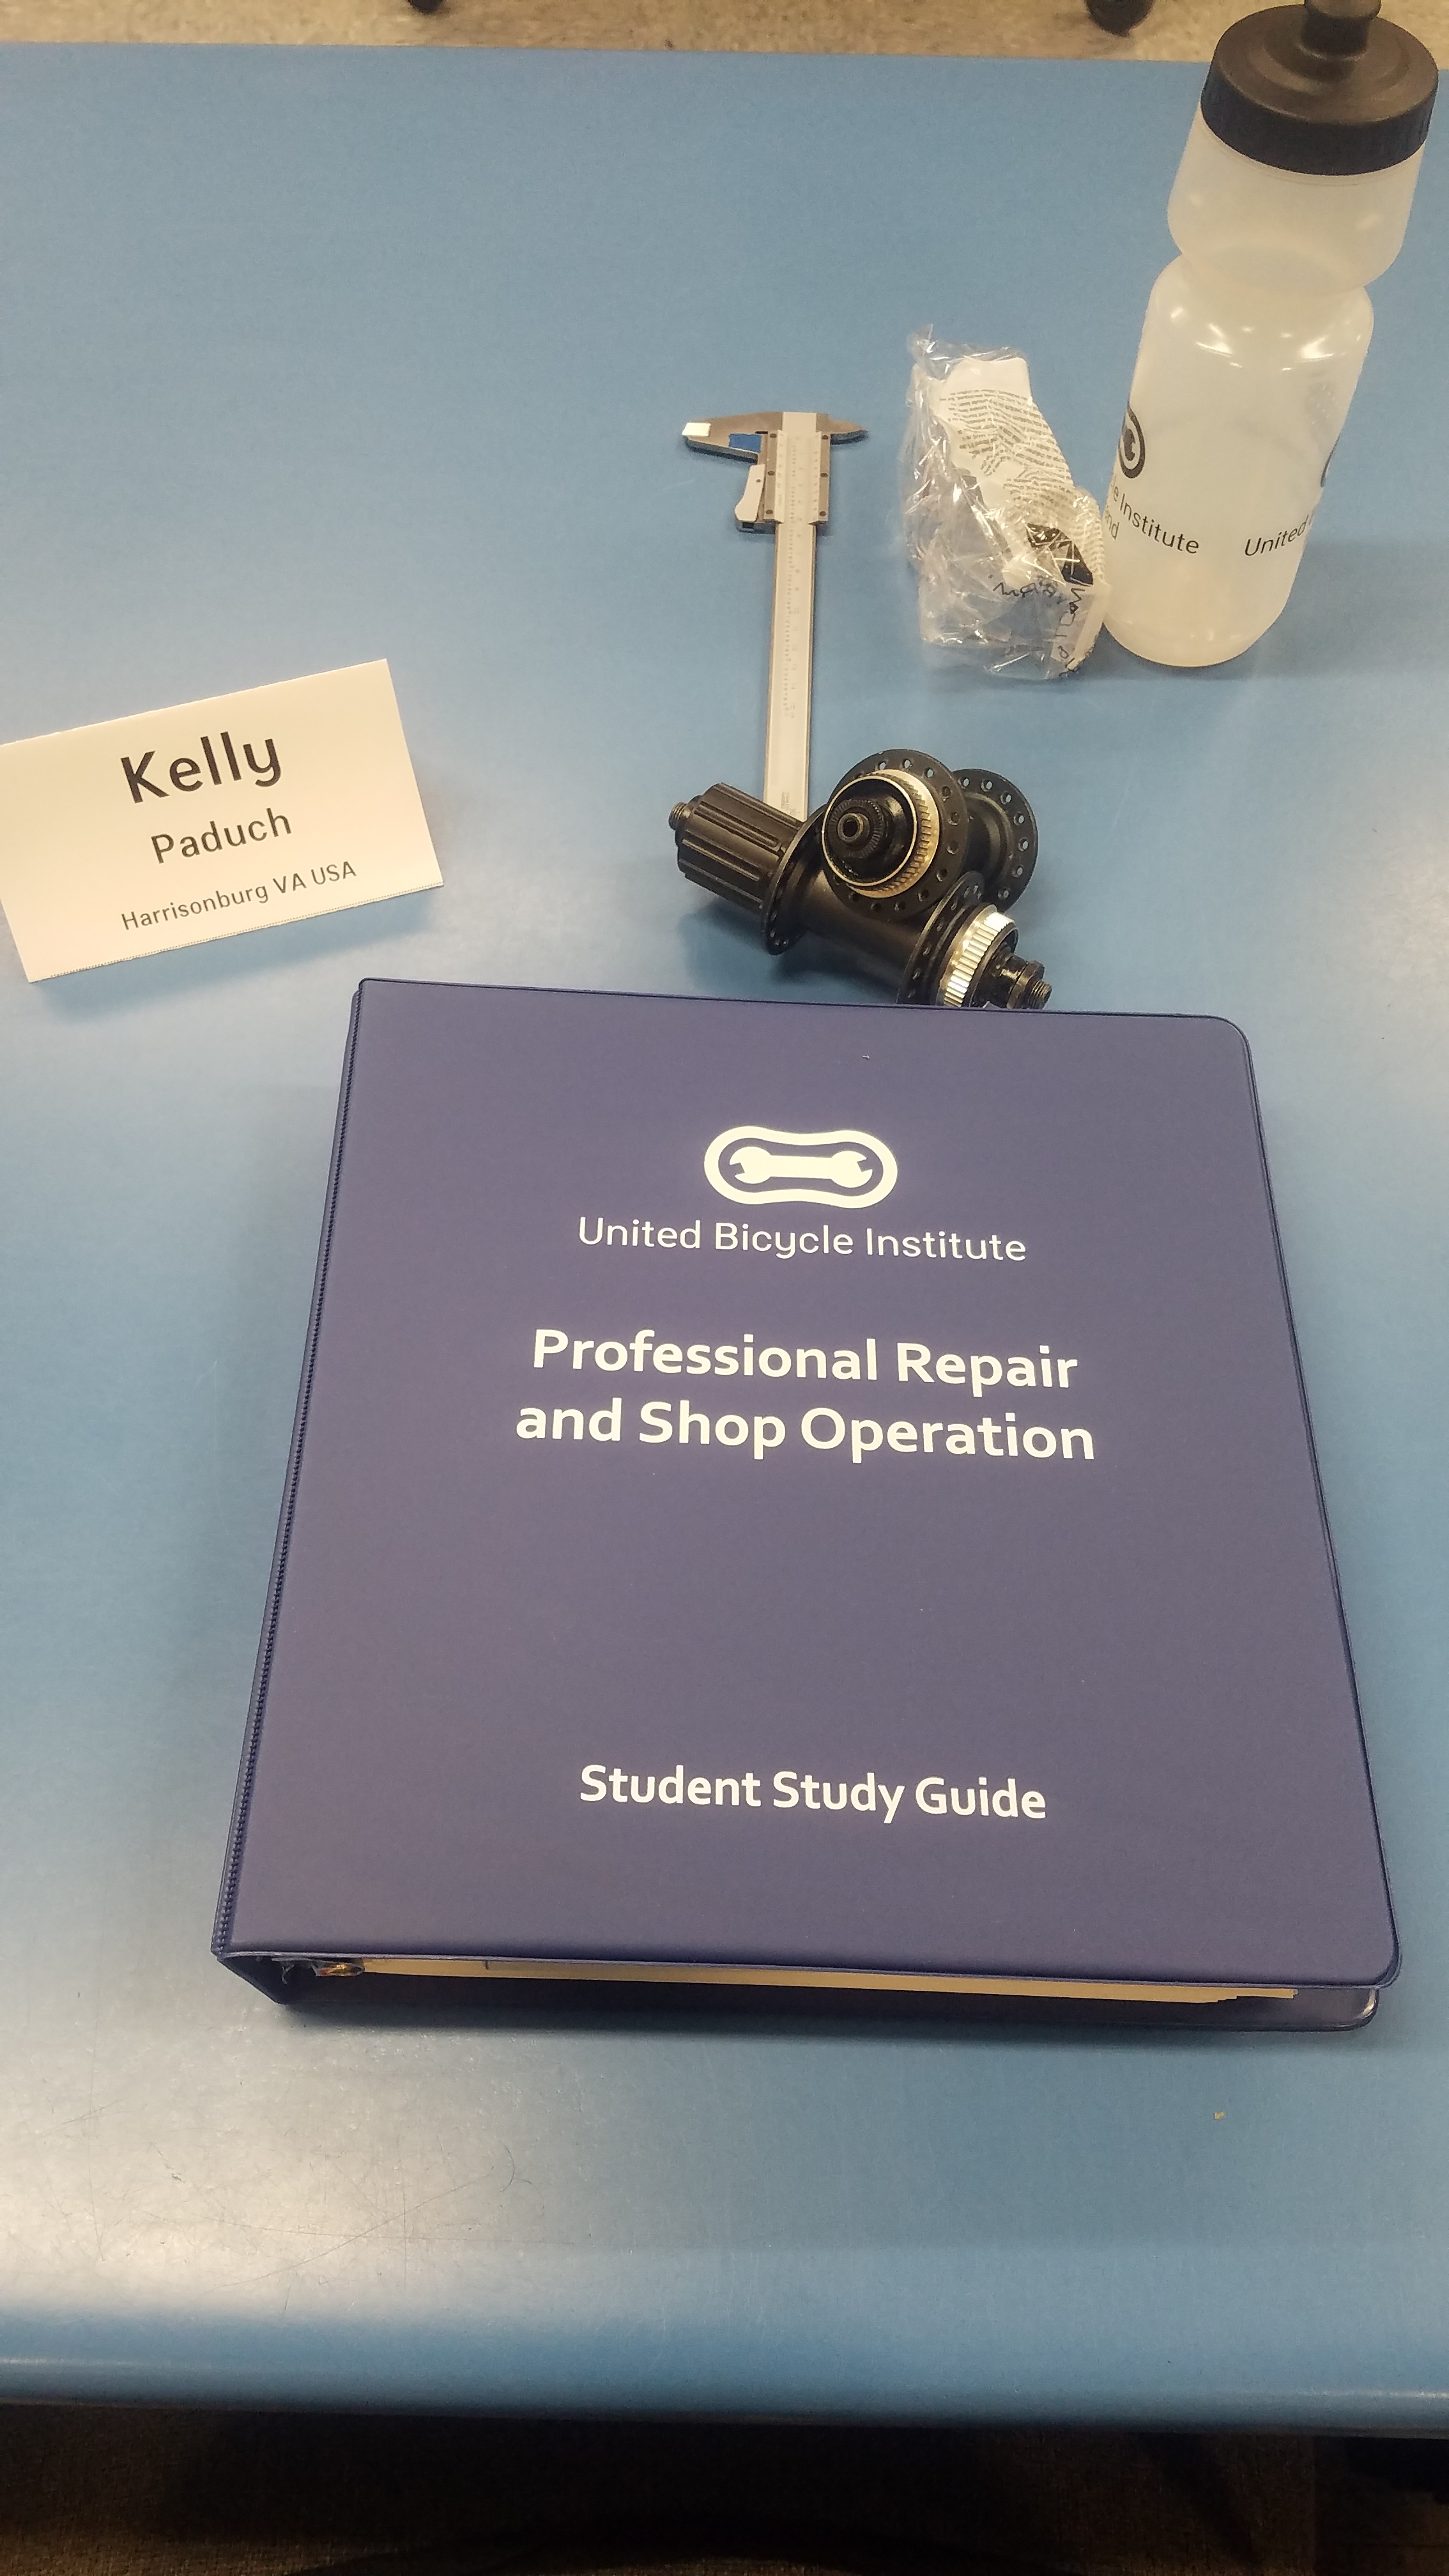
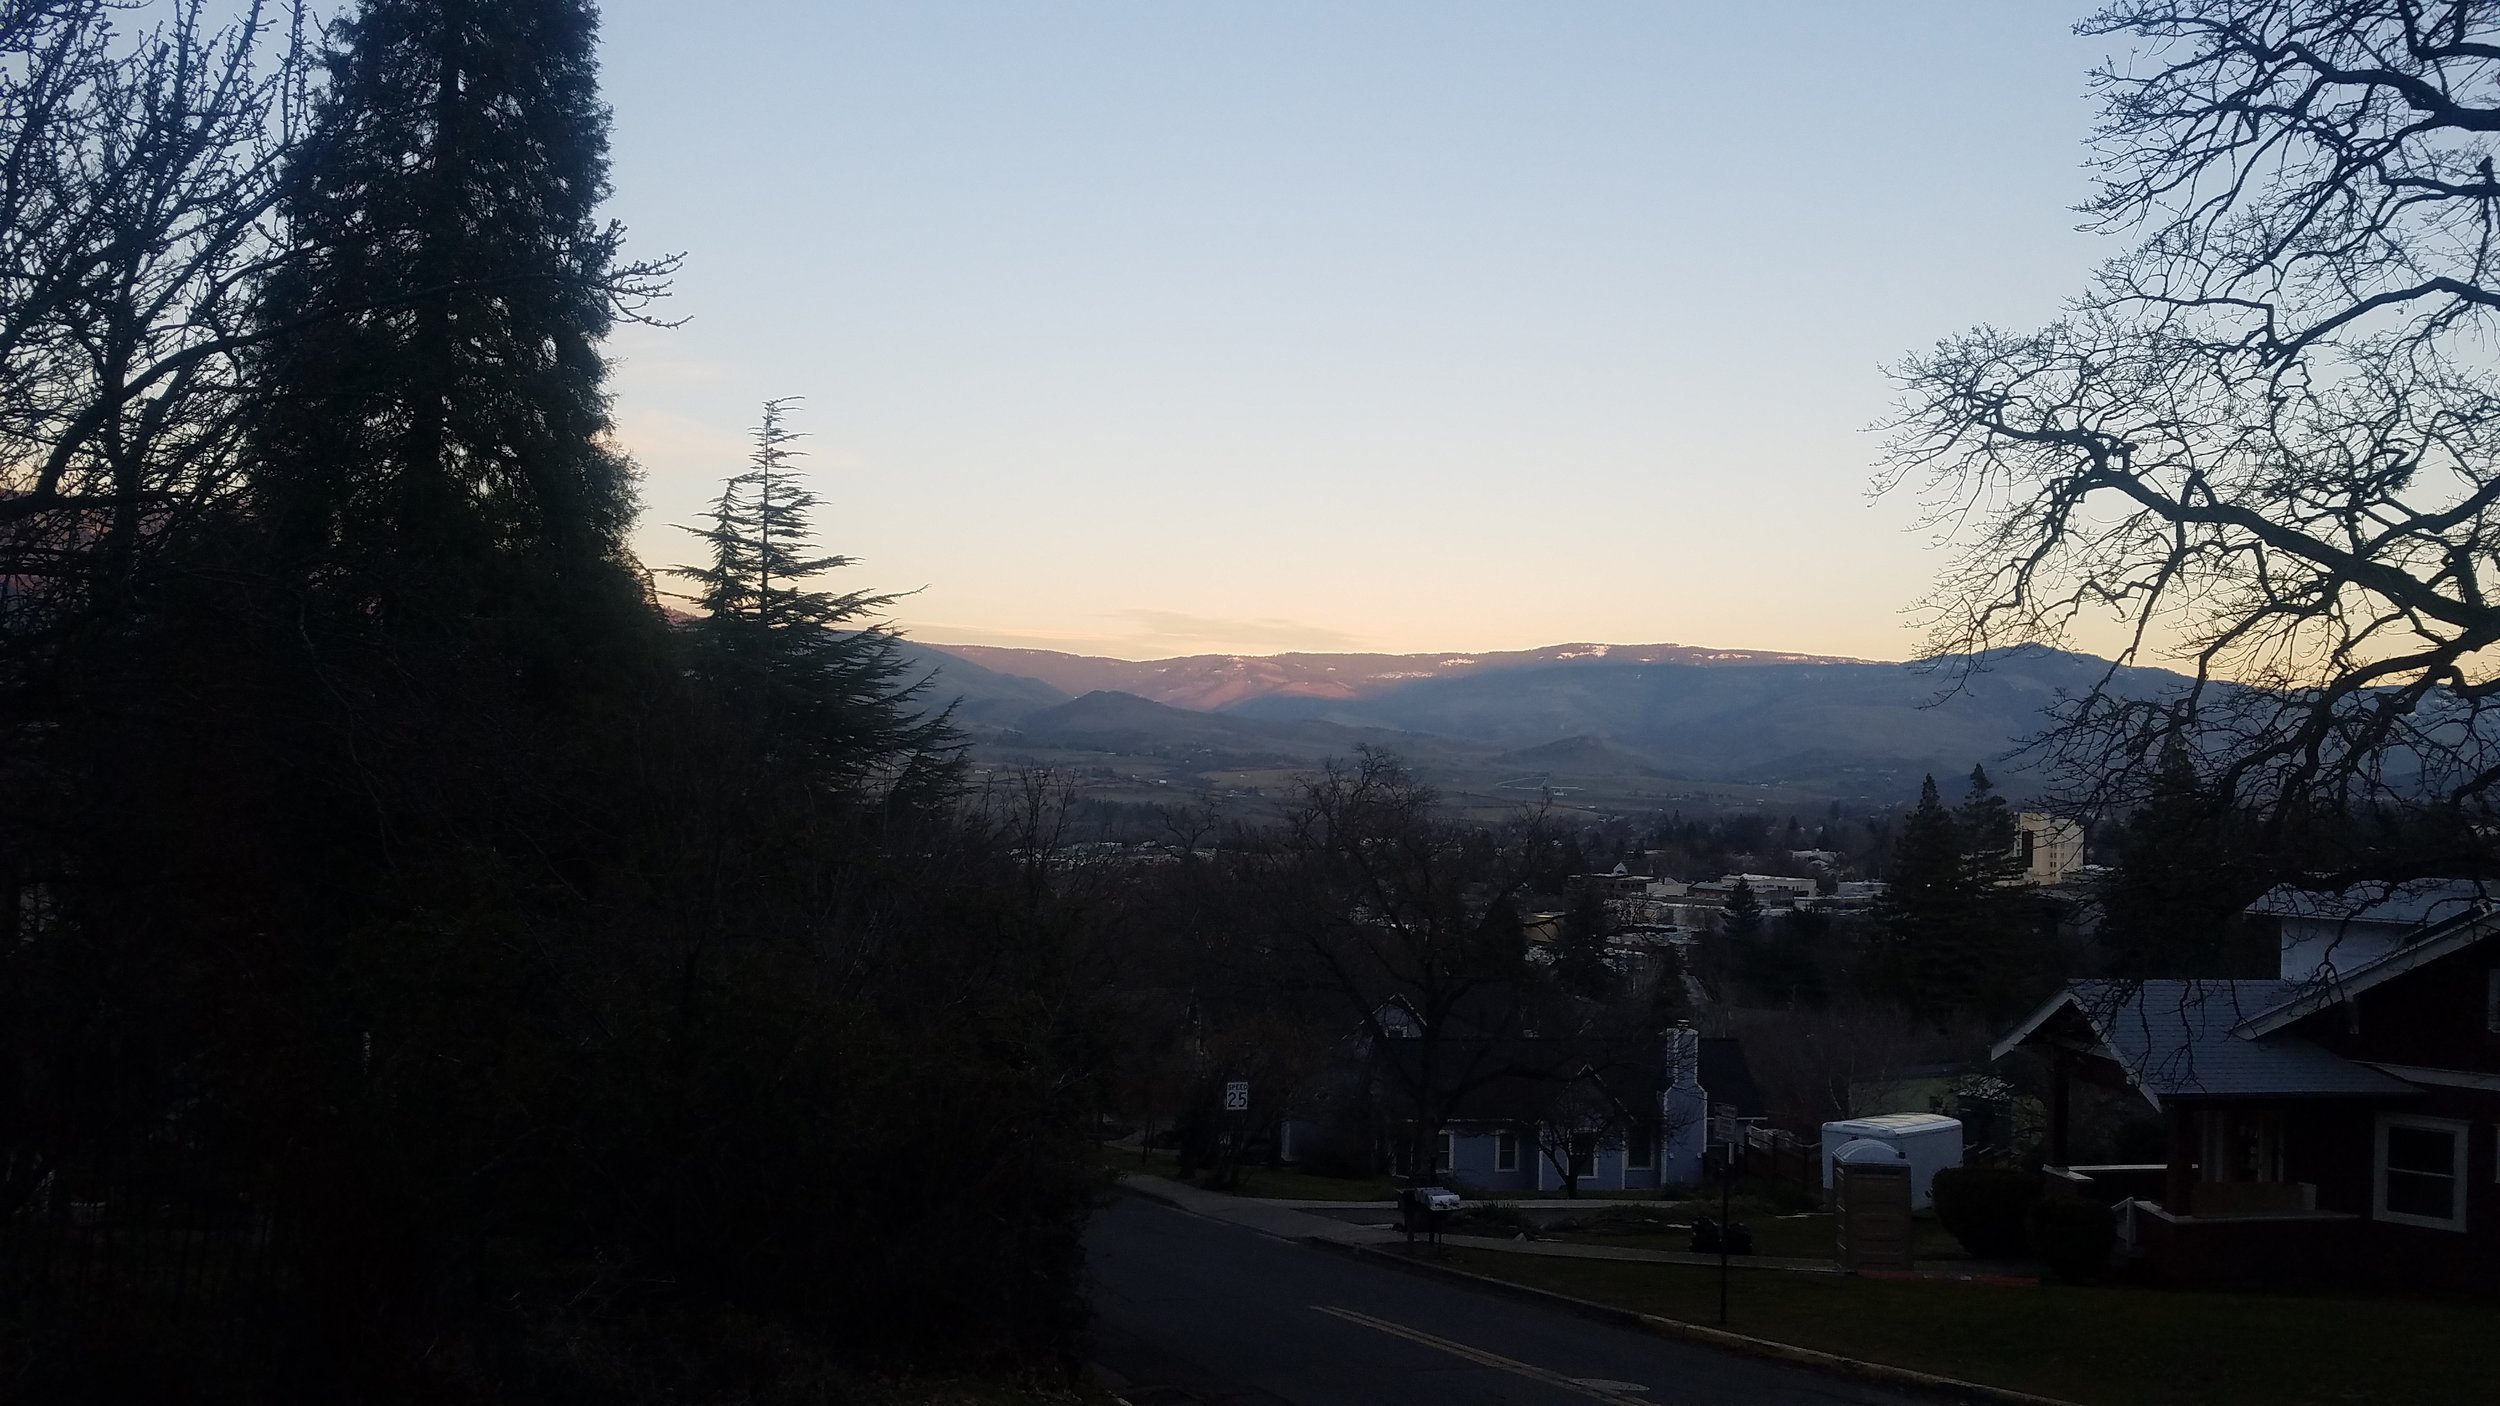
This past Fall, I had the opportunity to apply for a Women's Mechanic Scholarship presented by Quality Bicycle Parts (QBP) and supported through other various sponsors. The Mechanic Scholarship was for a women's only 10 day class on Professional Mechanic Repair and Shop Operation at United Bicycle Institute in Ashland, Oregon. In early January, I found out I had been chosen as one of sixteen women to attend the class!
I began my journey to Oregon early; the day before we started class. Three flights in a row will leave a person feeling quite tired, so I was stoked that most of the other women attending the class were already at the hostel we were staying in and were kind enough to share some food (and wine) when I showed up.
Each day of class provided a new topic to learn and work with in hands-on scenarios. Our first 5 days were as follows:
- Measuring Tools, Torque, & Wheel Components
- Wheel Building & Wheel repair (this was may favorite day of all of the classes)
- Repair Stands, Tires & Tubes, Bottom Brackets, & Cranks
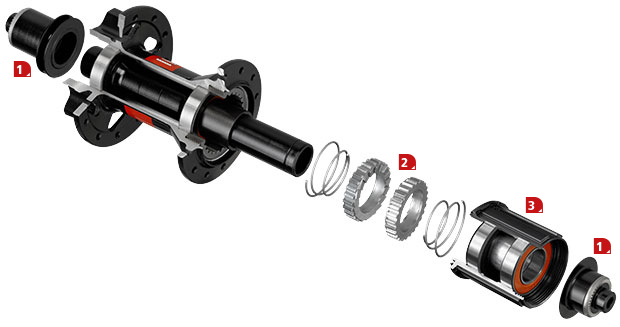
- Chainrings, Chains, Freehubs, Freewheels, Cassettes, & Gearing
- Derailleurs, Shift Levers, Cables, & Housing
Click on the pictures below to see what the first half of my week at UBI was like!


Within the 10 days of classes, we had a weekend between the first 5 and second 5 days to do some exploring. That Saturday, QBP covered the cost of mountain bike rentals for those of us that wanted to hit the trails (14 out of the 16 joined in on that!!!). What an awesome time that was! A lot of the women had never been on a mountain ride before. It was so much fun riding with them and seeing the excitement factor go up as they experienced a new way to ride bikes. The trails were great! I had been itching so hard to get out and ride, and this day did not disappoint. That night we were treated to a dinner at a local brewery with two employees of QBP and the UBI staff.
I enjoyed those trails so much that on Sunday I did a 10mile run up that same mountain and back down the trails.


After an awesome weekend getting to play outside all day, my brain was reset and ready to take on more bike information! The second set of 5 days of classes went as such:
6. Rim Brakes
7. Hydraulic Brakes & Suspension Service
8. Headsets & Frame Construction
9. Bike Overhaul Day
10. Shop Operation & Written Test
My favorite day of this week was Hydraulic Brakes and Suspension Service day. We were lucky enough to have guest instructor, Sara Jarrell, from SRAM, teach us an Avid brake bleed and Rock Shox suspension service. It was great to hear about her time in the bike industry and her experience with SRAM.
The last two days were for our "final exams". Thursday was completing a bike overhaul, which started with completely disassembling and cleaning the bike, and then putting it back together with proper grease, torque spec, cable routing, etc.
The last day was a written exam on all of the information we had learned in the last 9 days. It was fairly intense and not so much about having that information memorized, but knowing how to use your resources (that your shop usually has) to solve a bike mechanic issue. I don't know if I passed this test, yet. I will hopefully find out in the next week or so.
After we were all finished, it was amazing to realize all that we had learned and accomplished in just 10 days. The experience as a whole showed me how big the bicycle world is. I met and worked with talented, strong, independent women from all over the country. Thanks to them, our two instructors, everyone at UBI, and QBP, I am returning to my position here at Rocktown with newfound ability and confidence.


The land of the Wild & Wonderful
Exploring by bike in one of the best places in the world
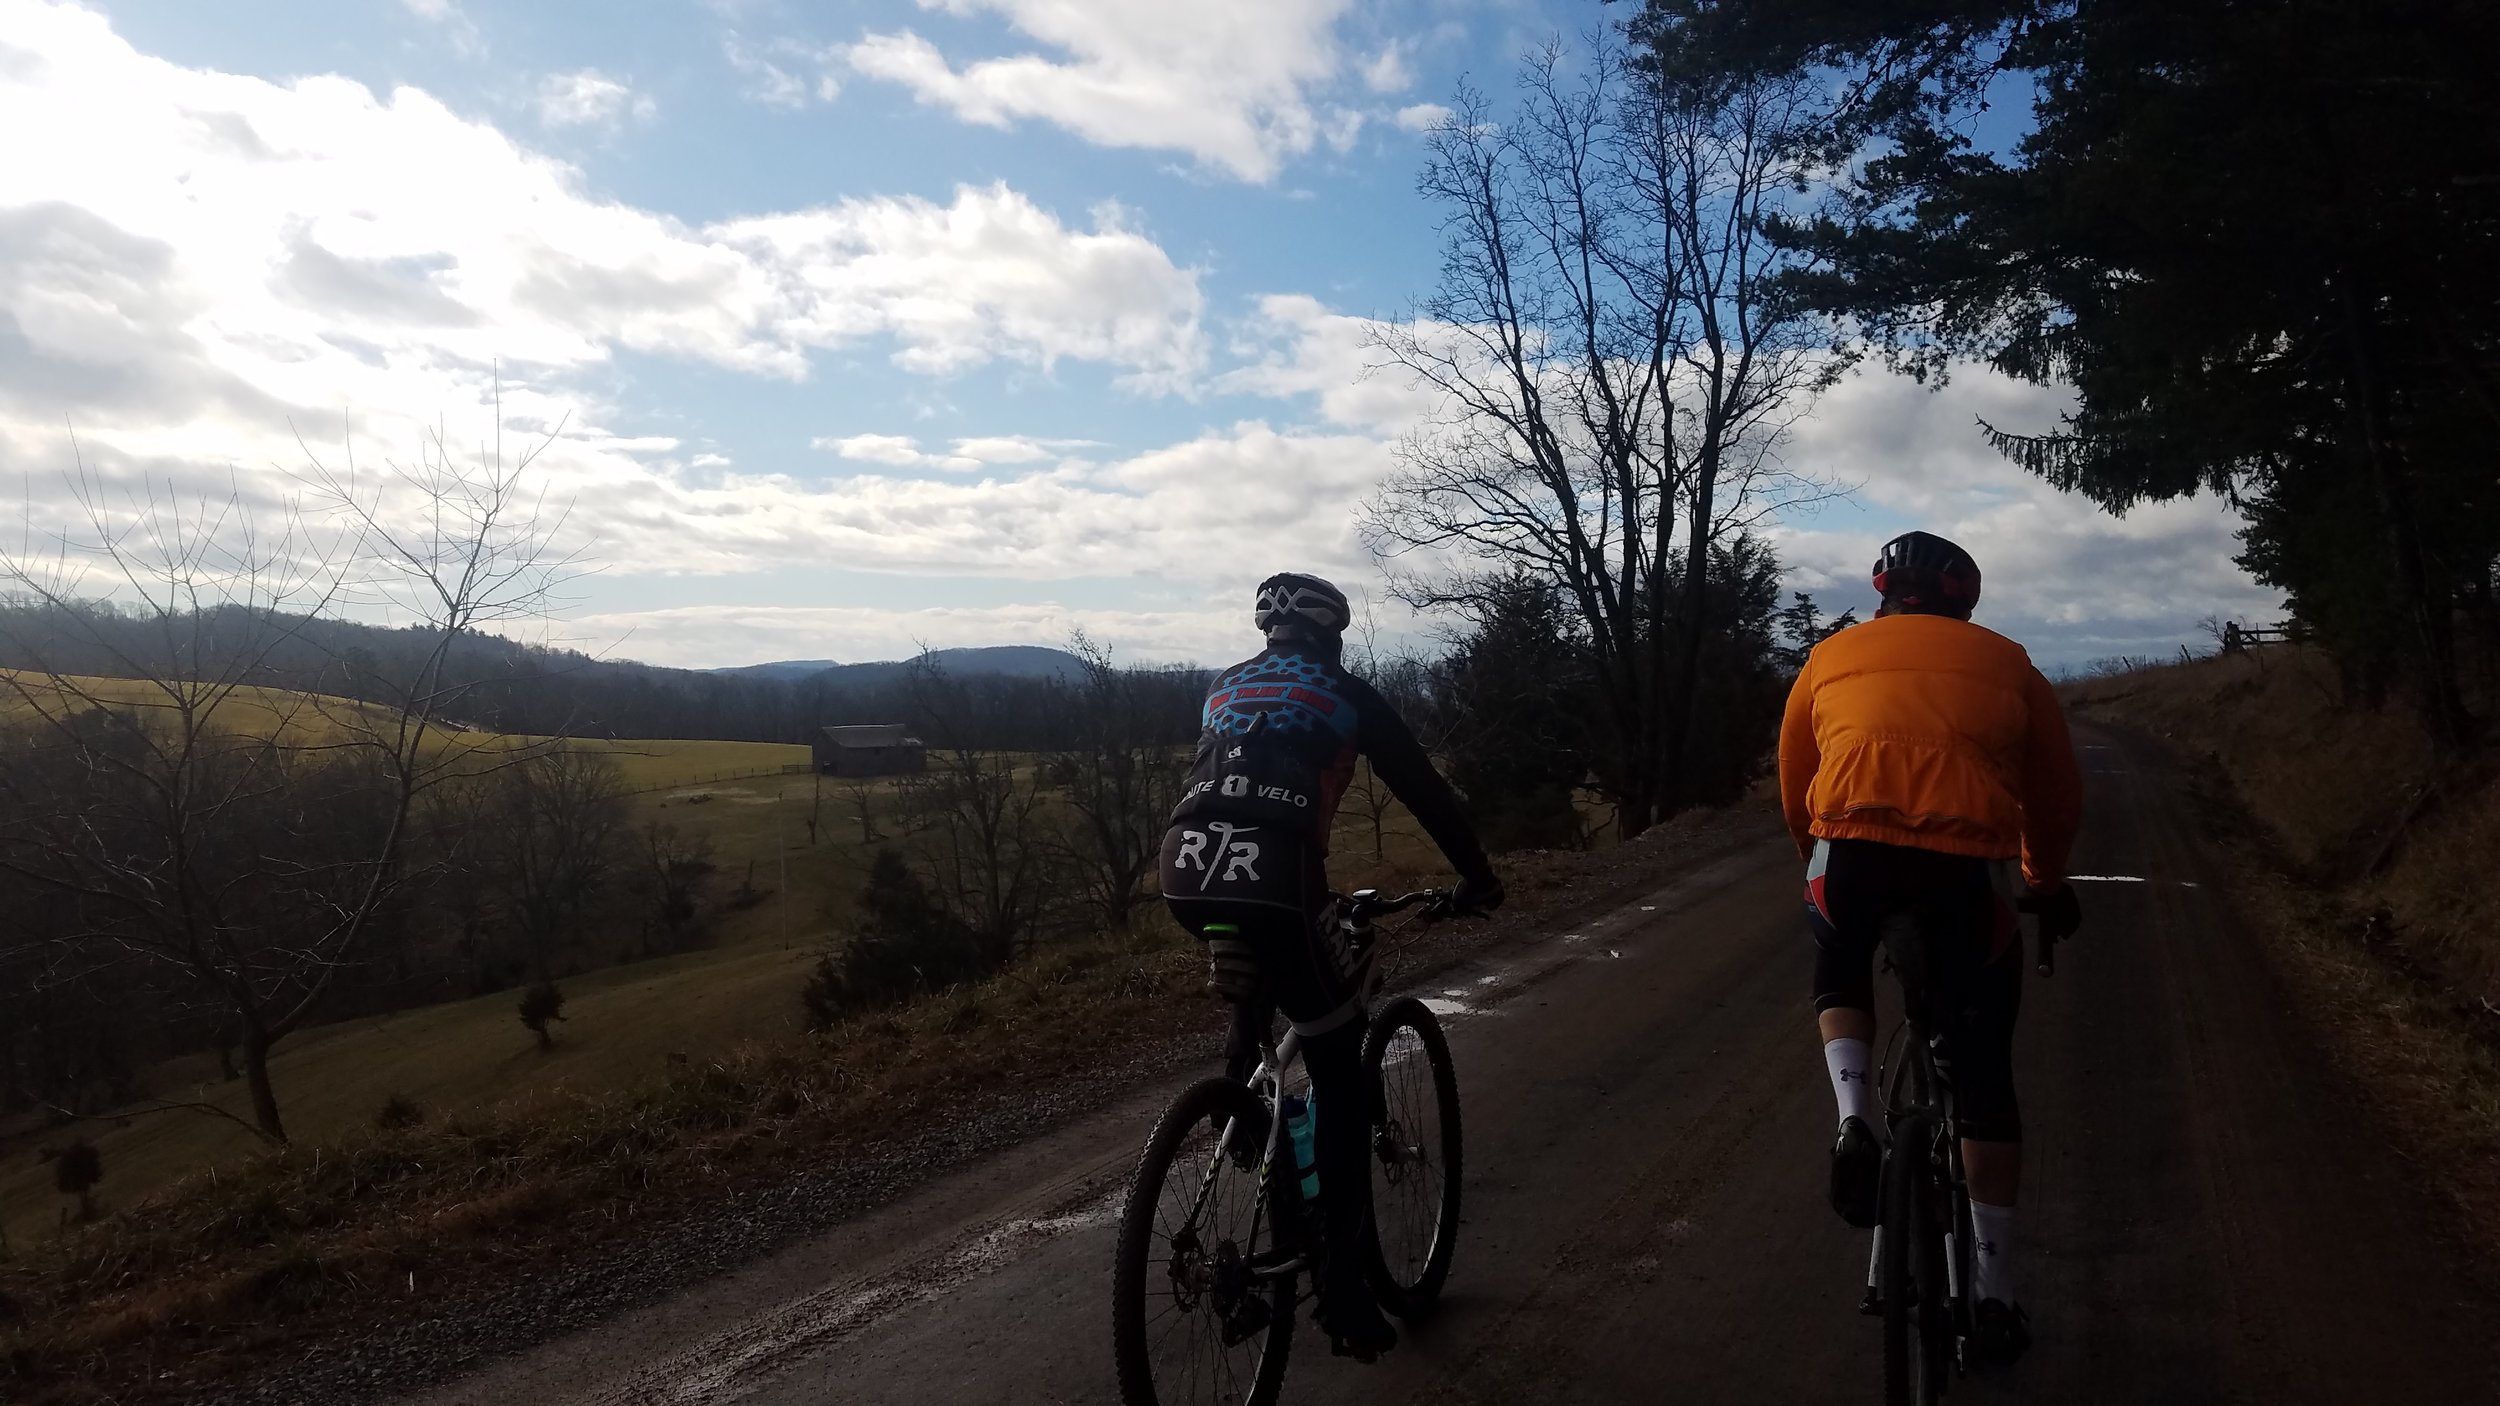
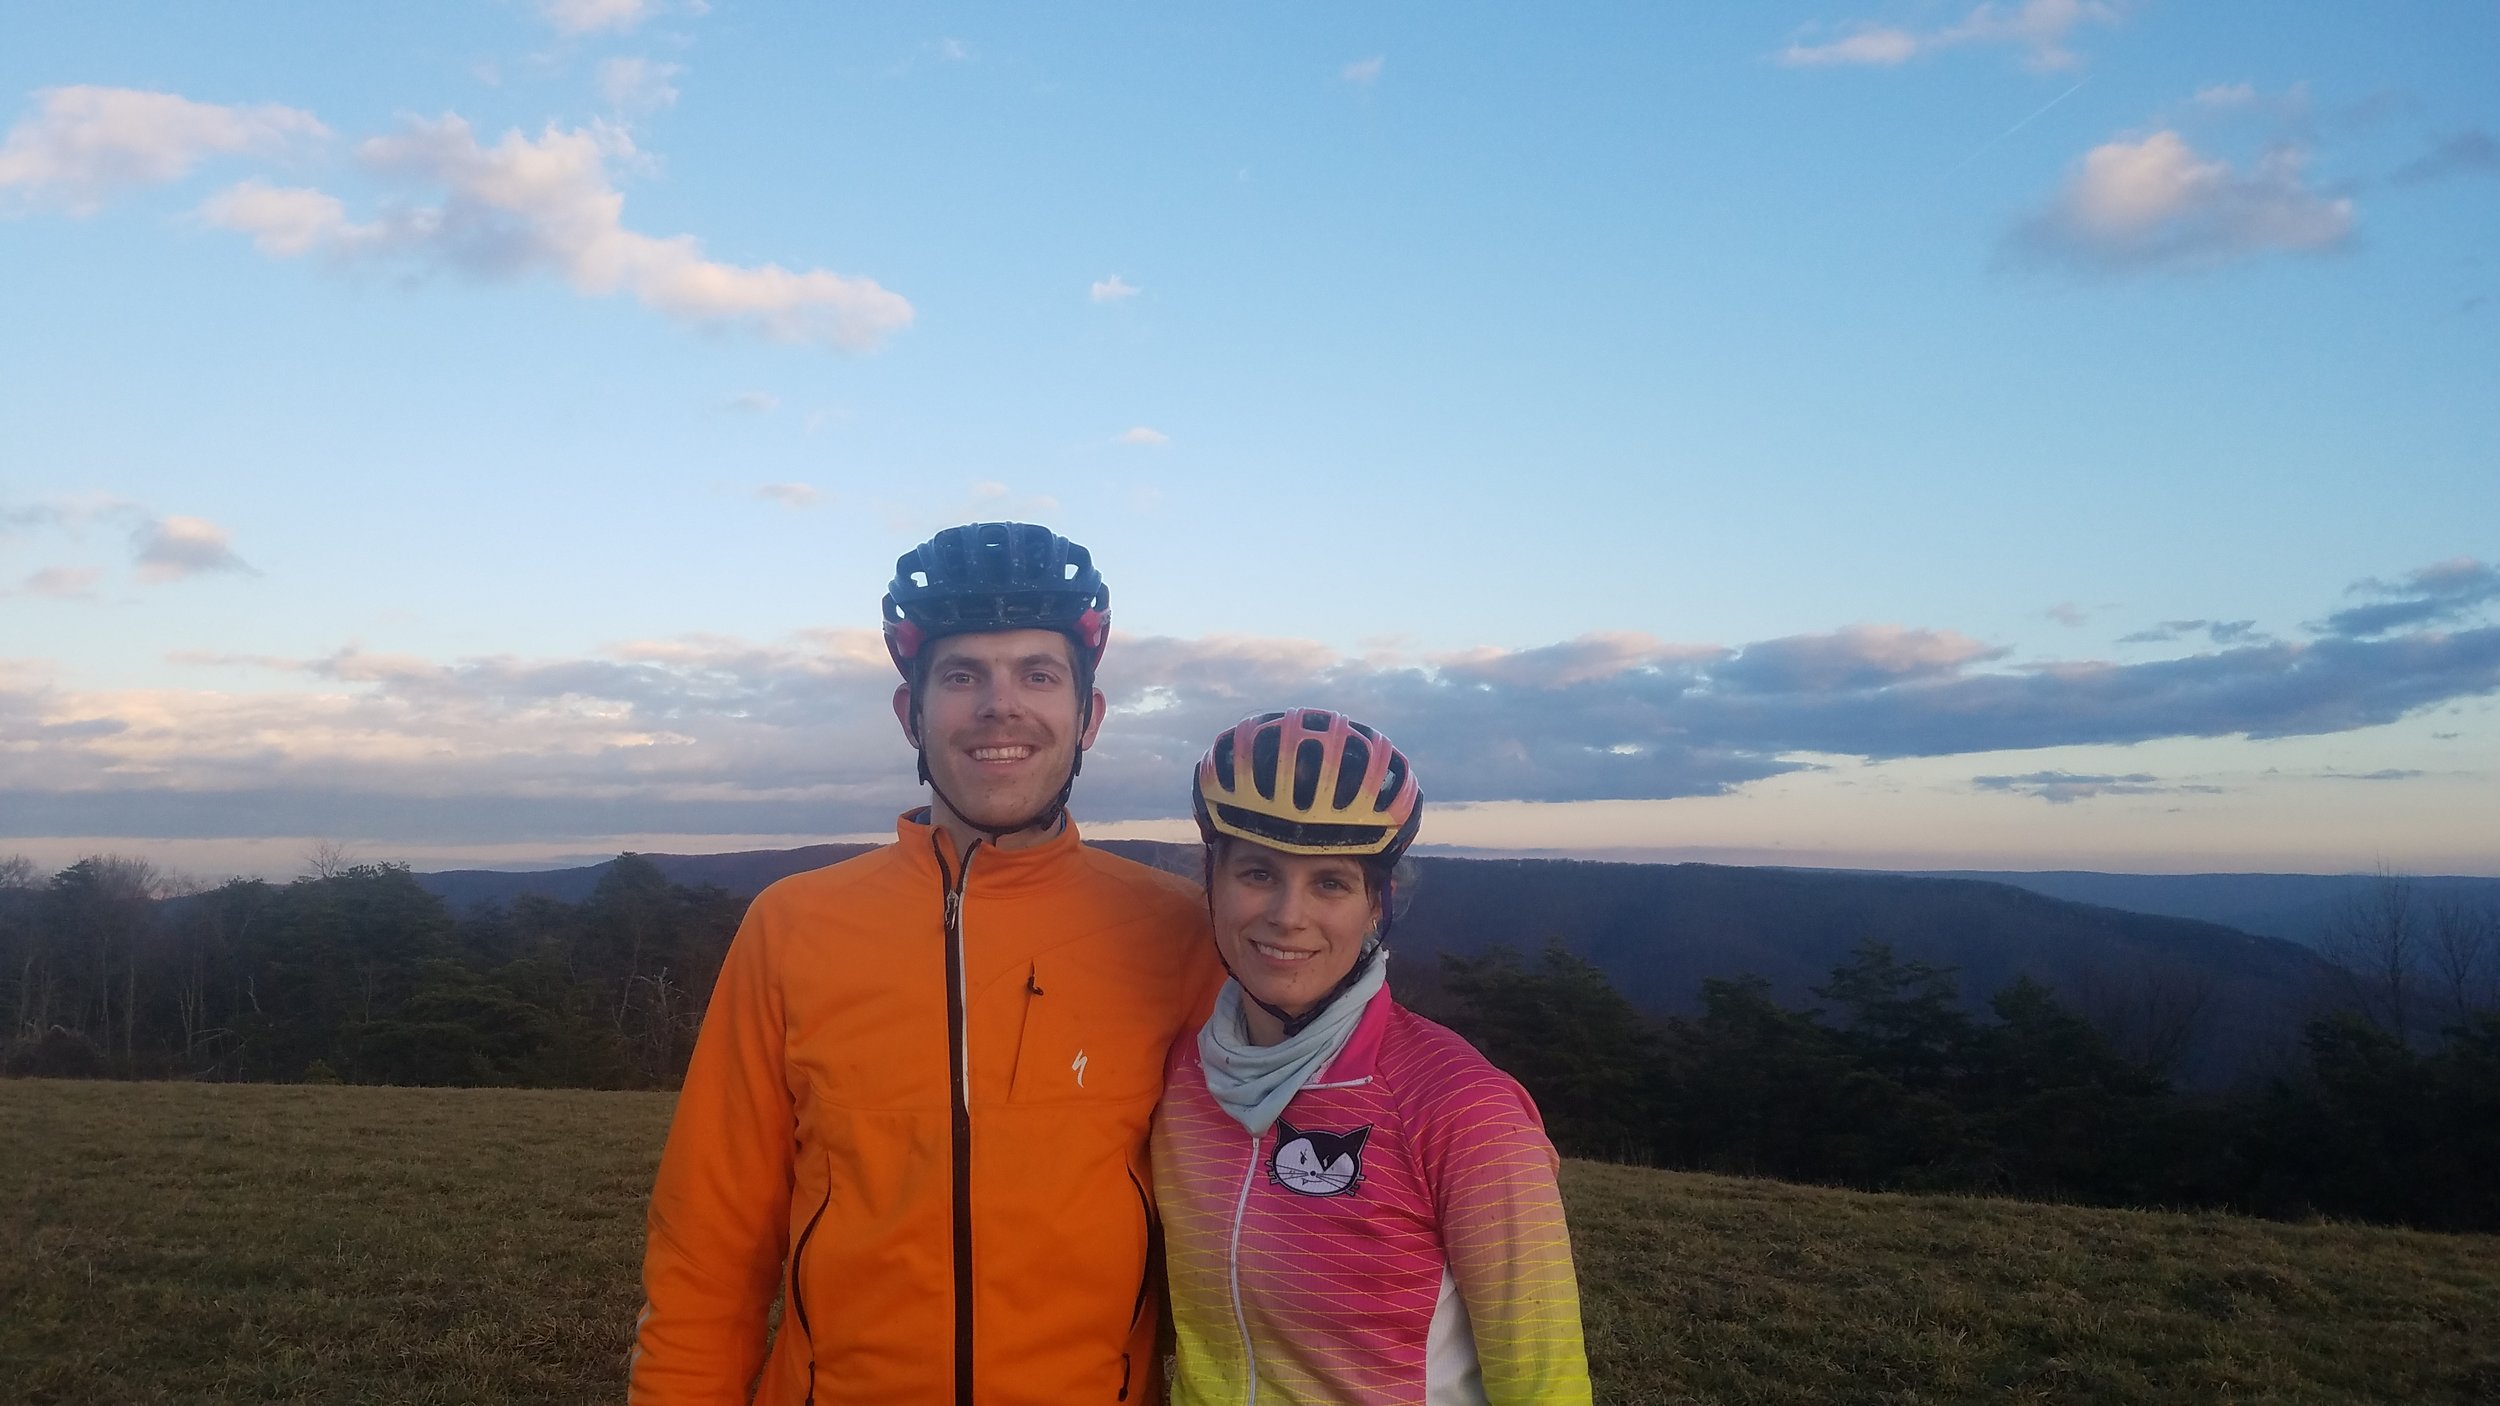
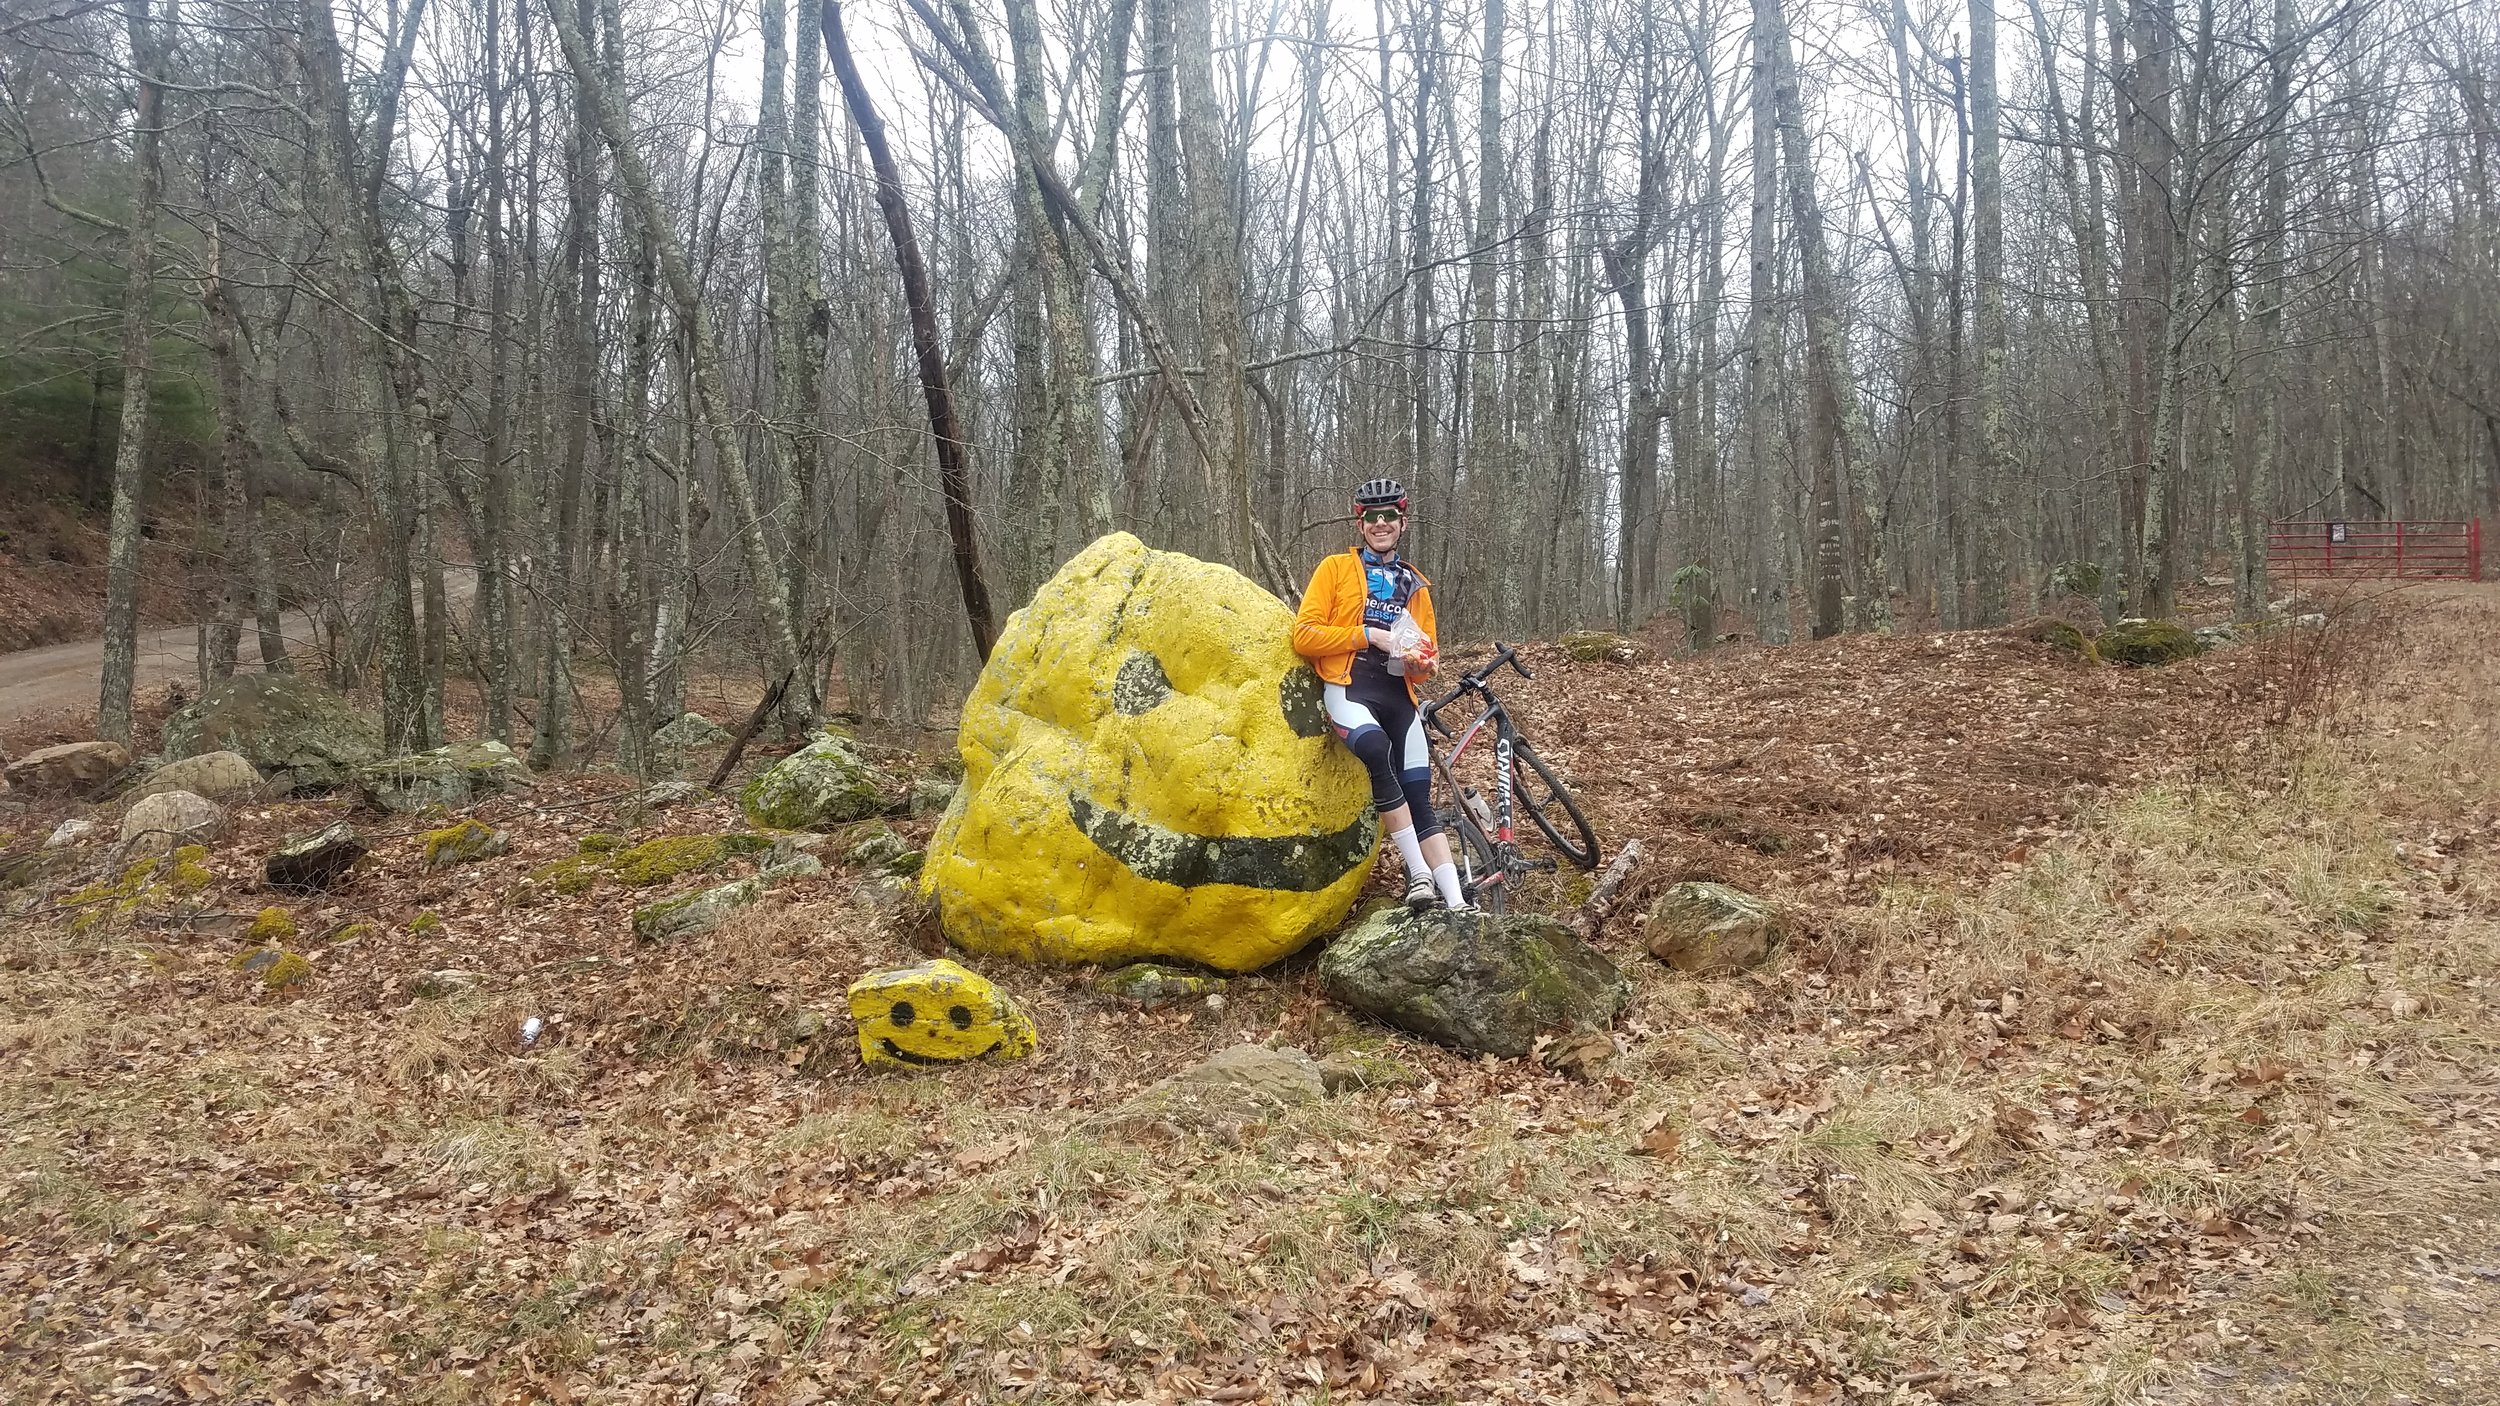
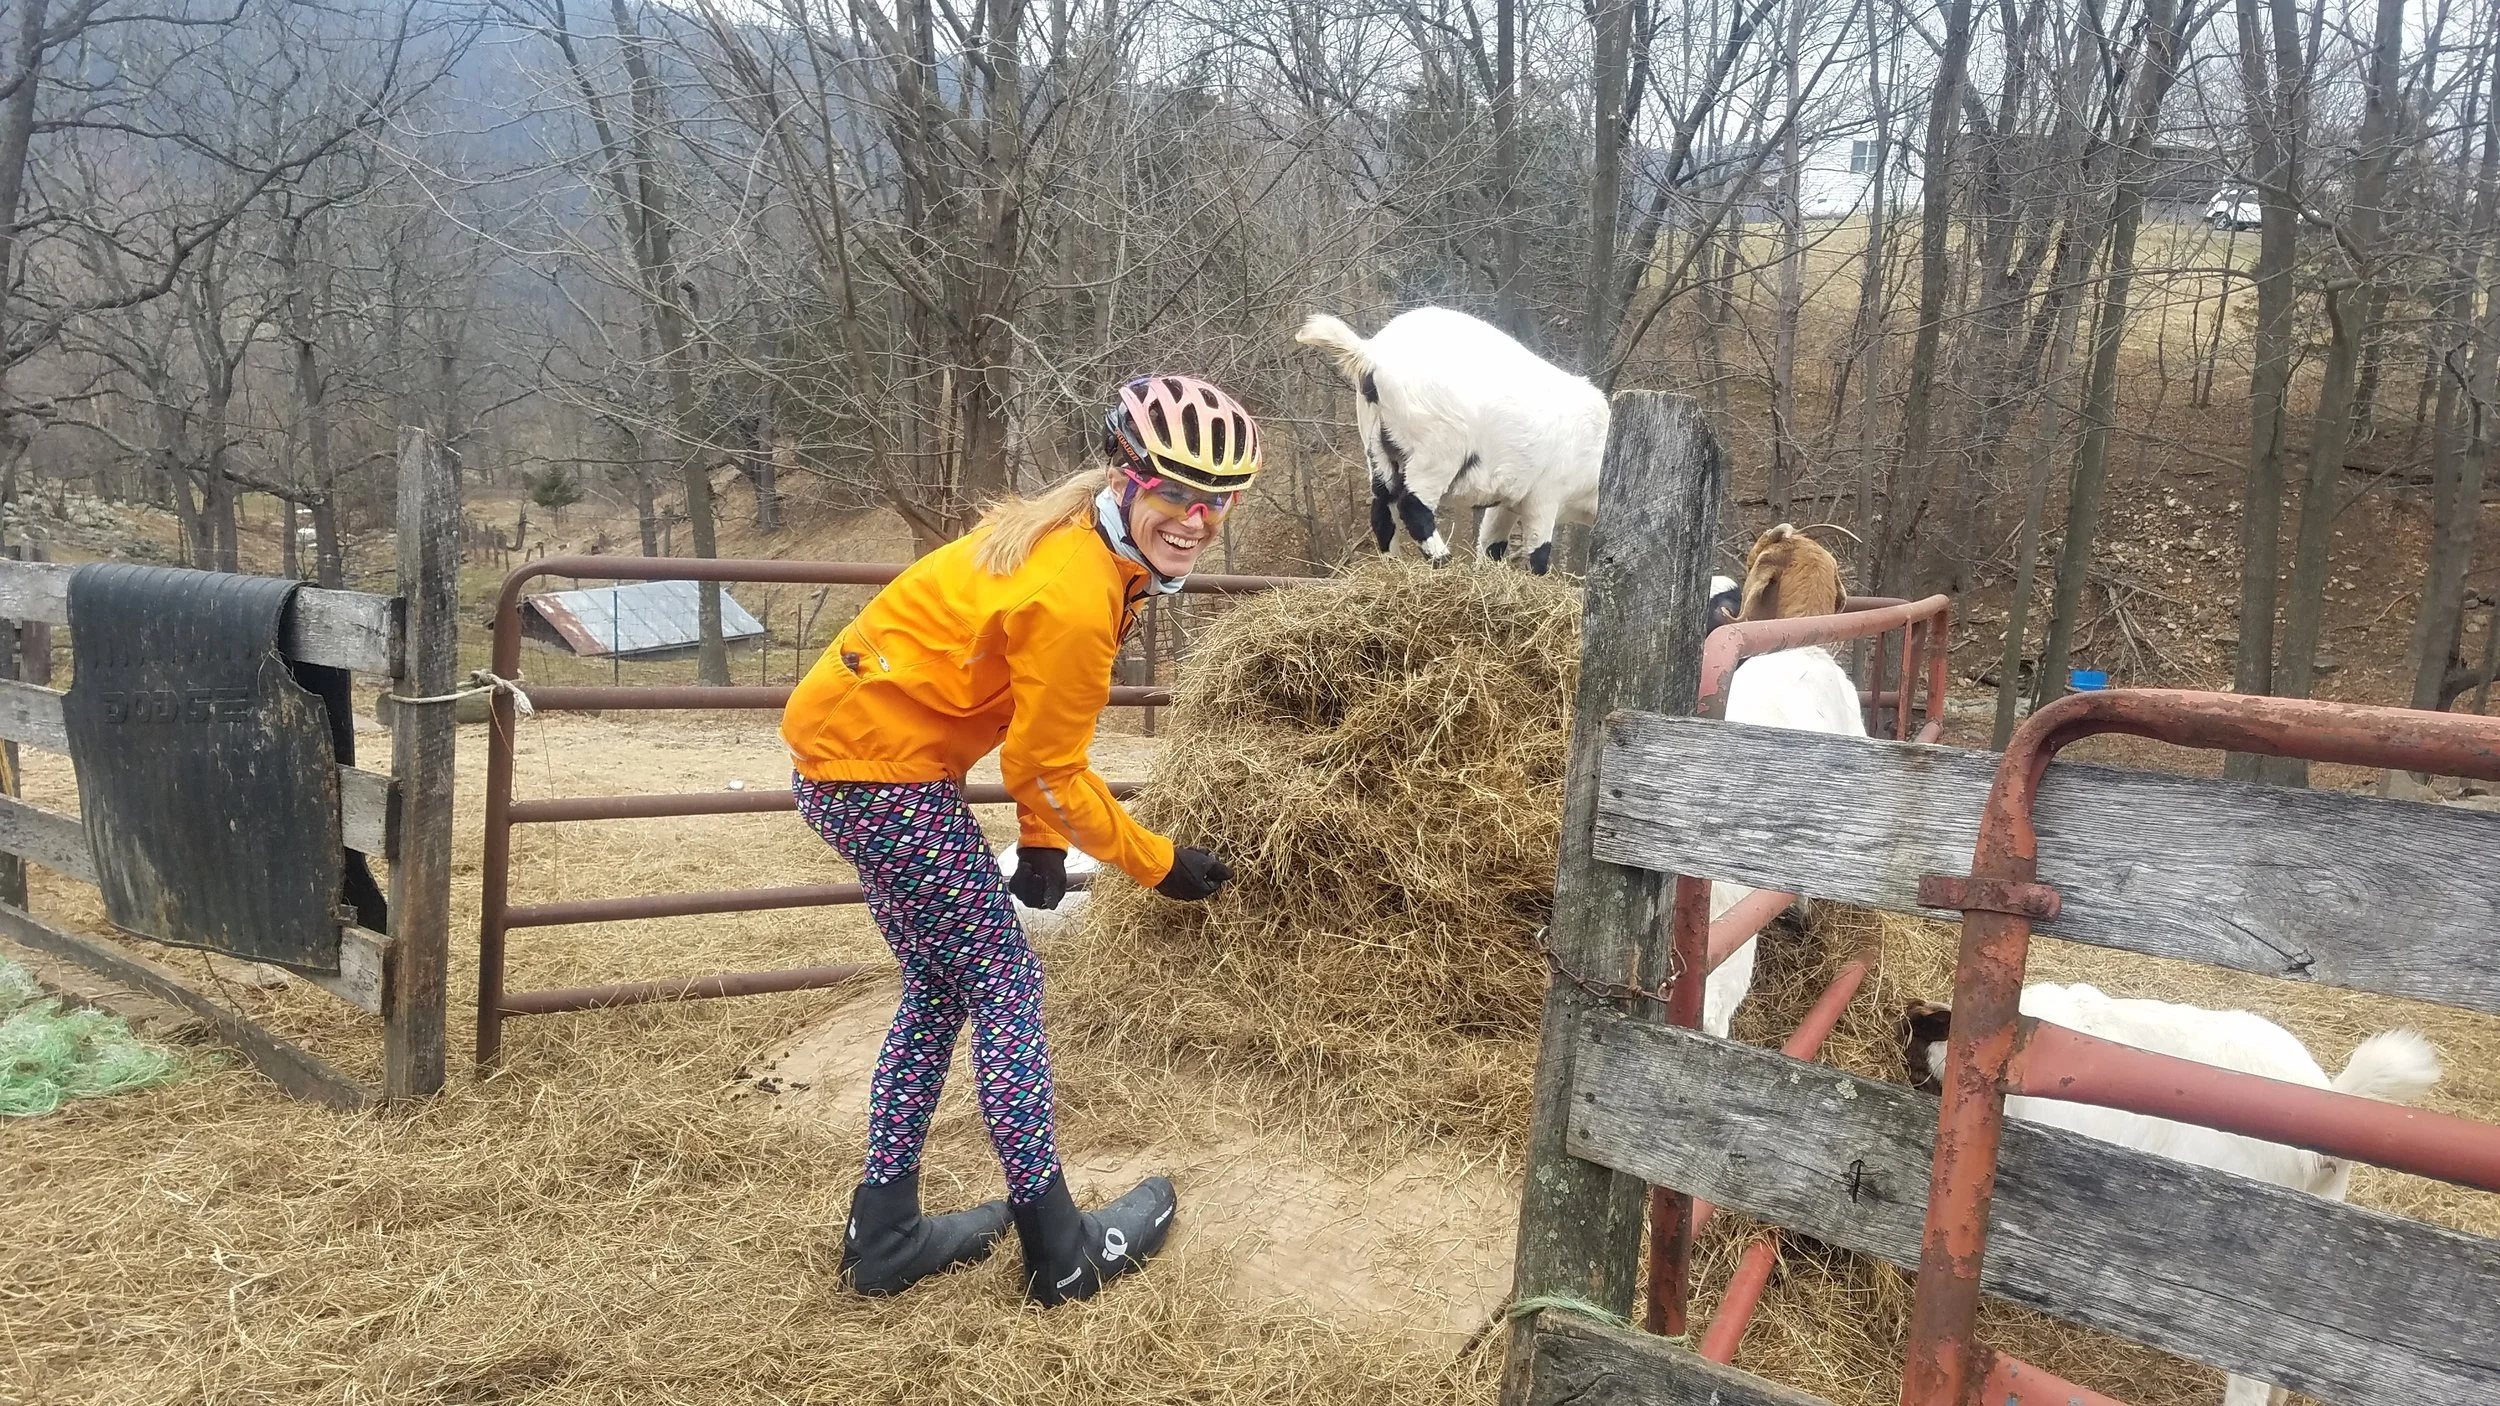
Over the weekend, Chris and I headed out to Raw Talent Ranch (aka Lost River Barn) for 3 days of adventuring by bike.
"Raw Talent Ranch is a place for cyclists to connect with the pure and expansive idylic roads of Hardy County, West Virginia."
"Whether you’re just discovering the rich rewards the bike brings or you are a racer looking to fine tune form and test your limits RTR offers a challenge set against a backdrop to remember and inspire." http://www.rawtalentranch.com/about/
It is absolutely amazing up there. Words and pictures truly cannot do justice to the experiences had, but I shall try.
Raw Talent Ranch is the brain child of Jay Moglia. He's a bike courier in DC by week, and ride leader extraordinaire by weekend. He's been a part of the cycling and race scene for quite some time, and enjoys sharing the wonderful riding he has discovered out here with fellow cyclists and bike teams/groups. Rapha Prestige held an "Appalachia" event through Raw Talent Ranch this past August. I'm pretty sure their minds were blown just as much as mine was. You can read about their ride HERE (I recommend it!).
The day we headed out there, as we were winding our way up Howards Lick Rd in the van, we passed through Lost River State Park. I remember saying to Chris in excitement, "This is so beautiful!" His response was, "This isn't even close to all of it."
That's pretty much how the entire weekend went. My mind was just continually blown by the beauty, adventure, challenging terrain, and all around good vibes that occurred both on and off of the bike. And to be able to return to a beautifully restored barn and hang out in cozy spots after wrecking yourself on the bike all day was the cherry on top.
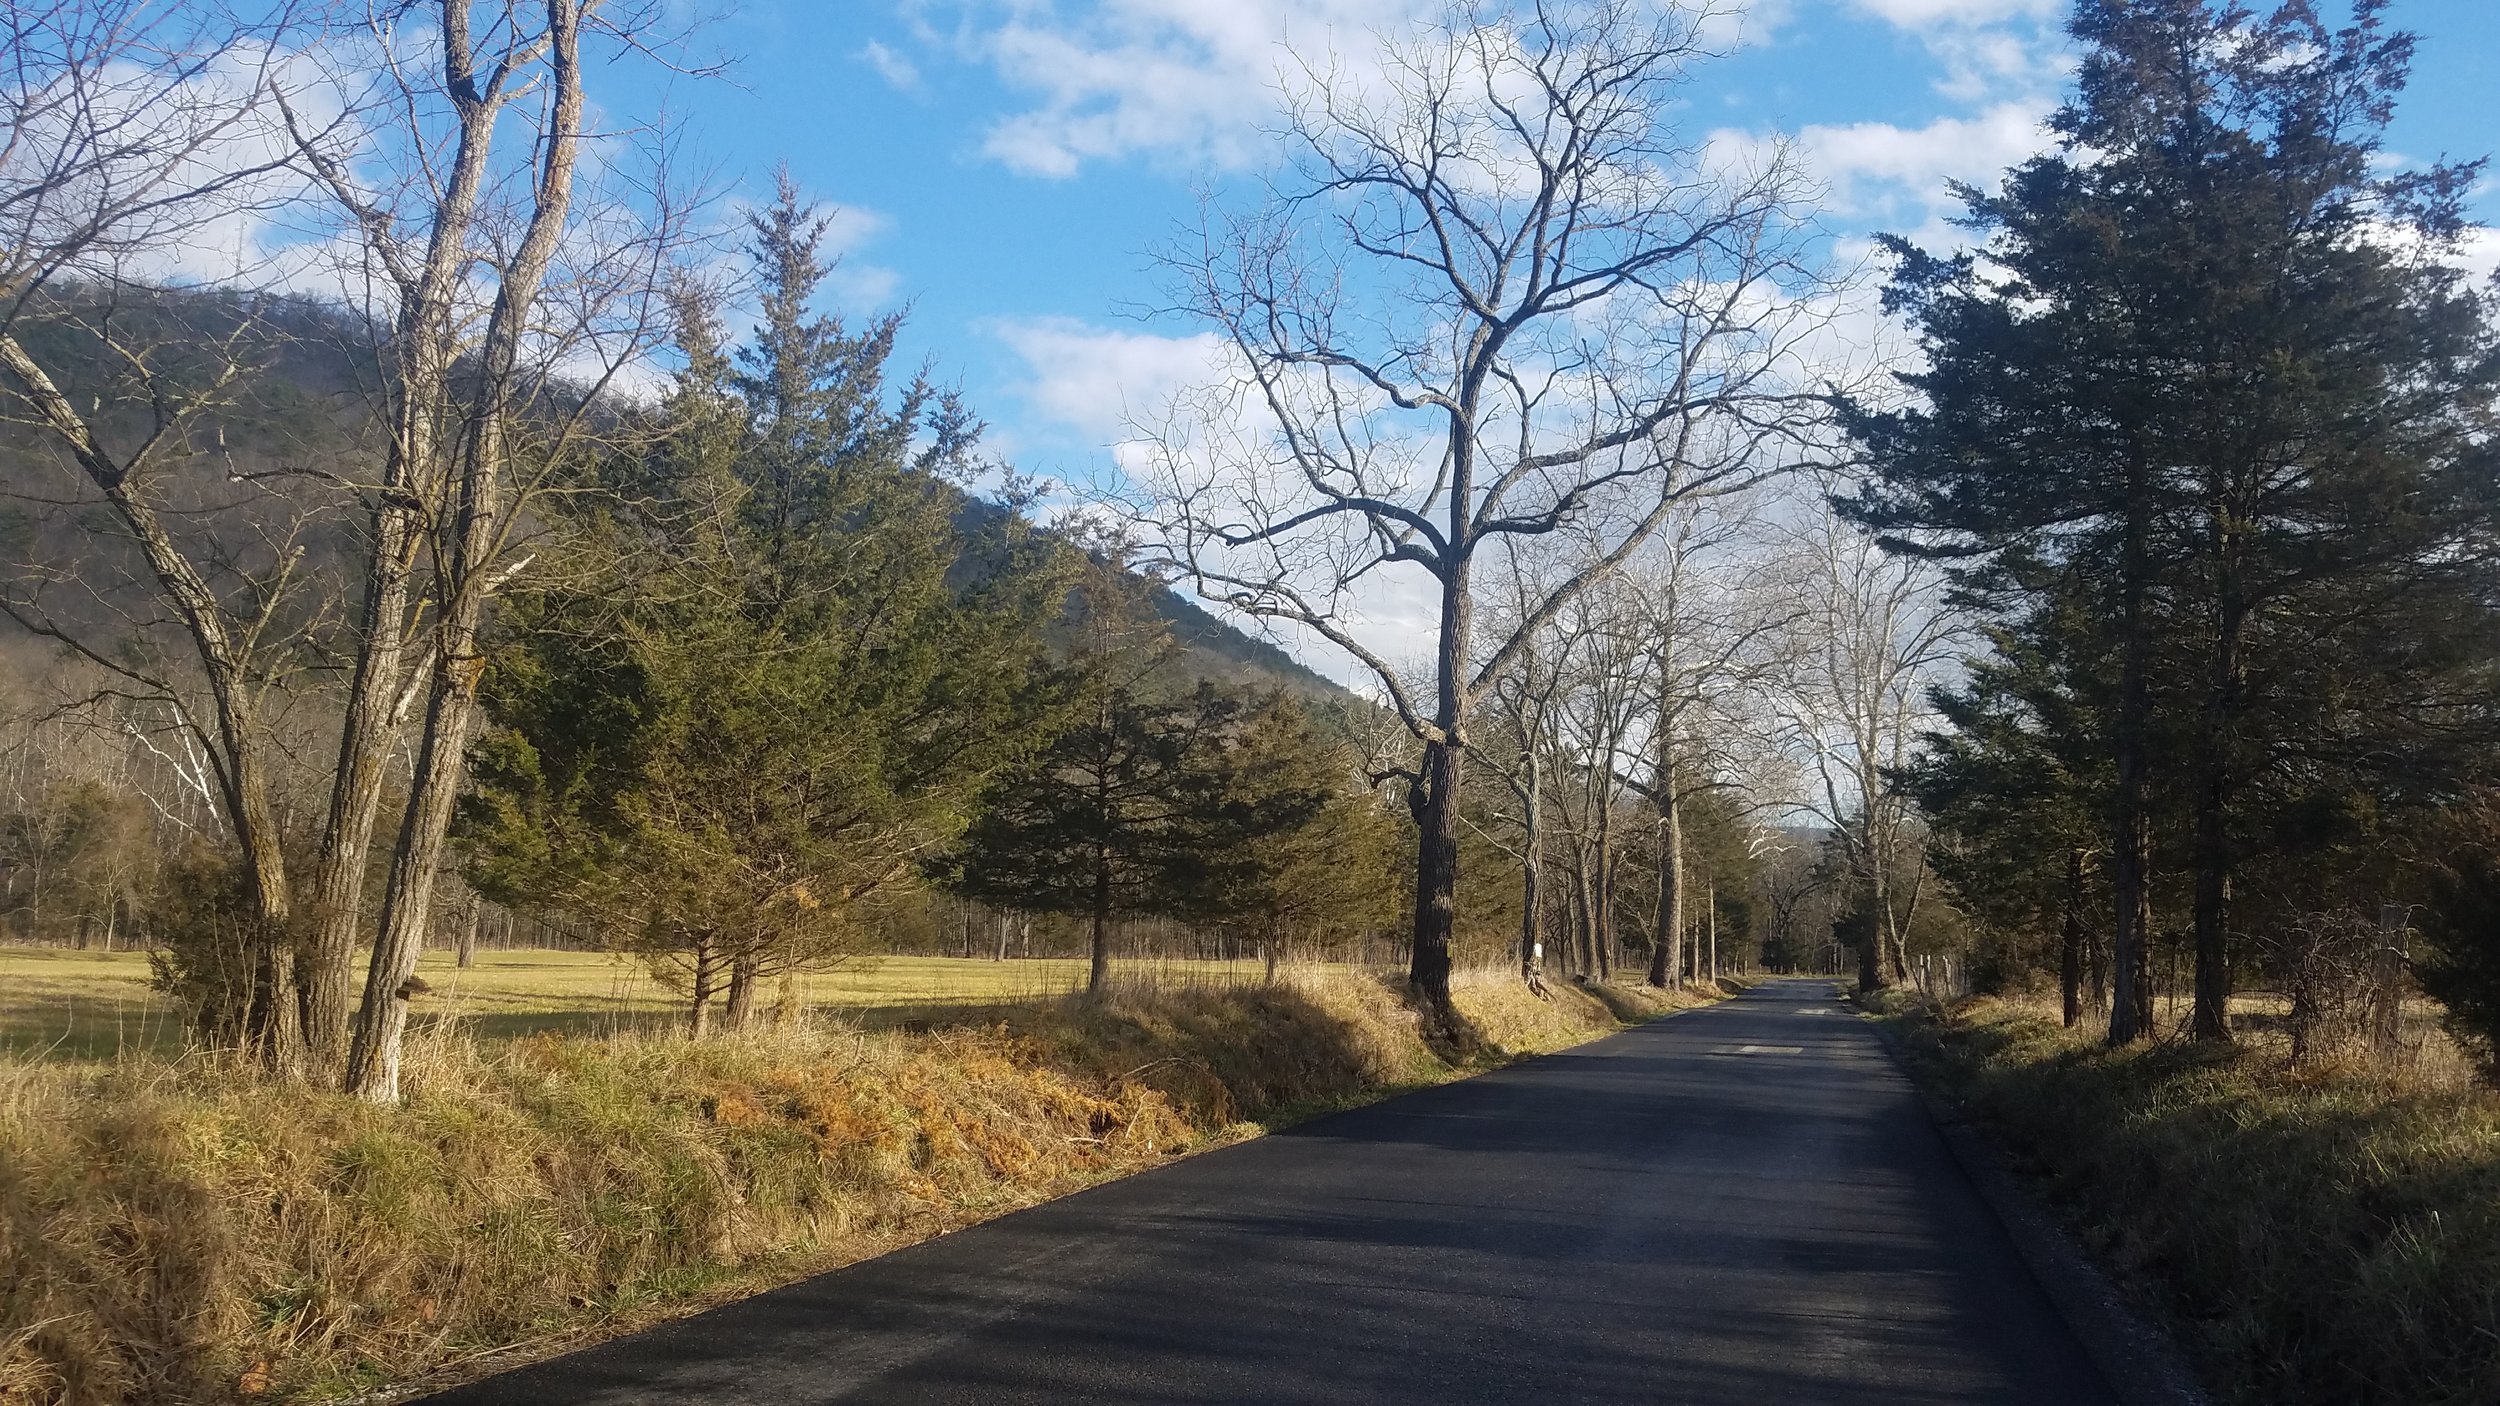
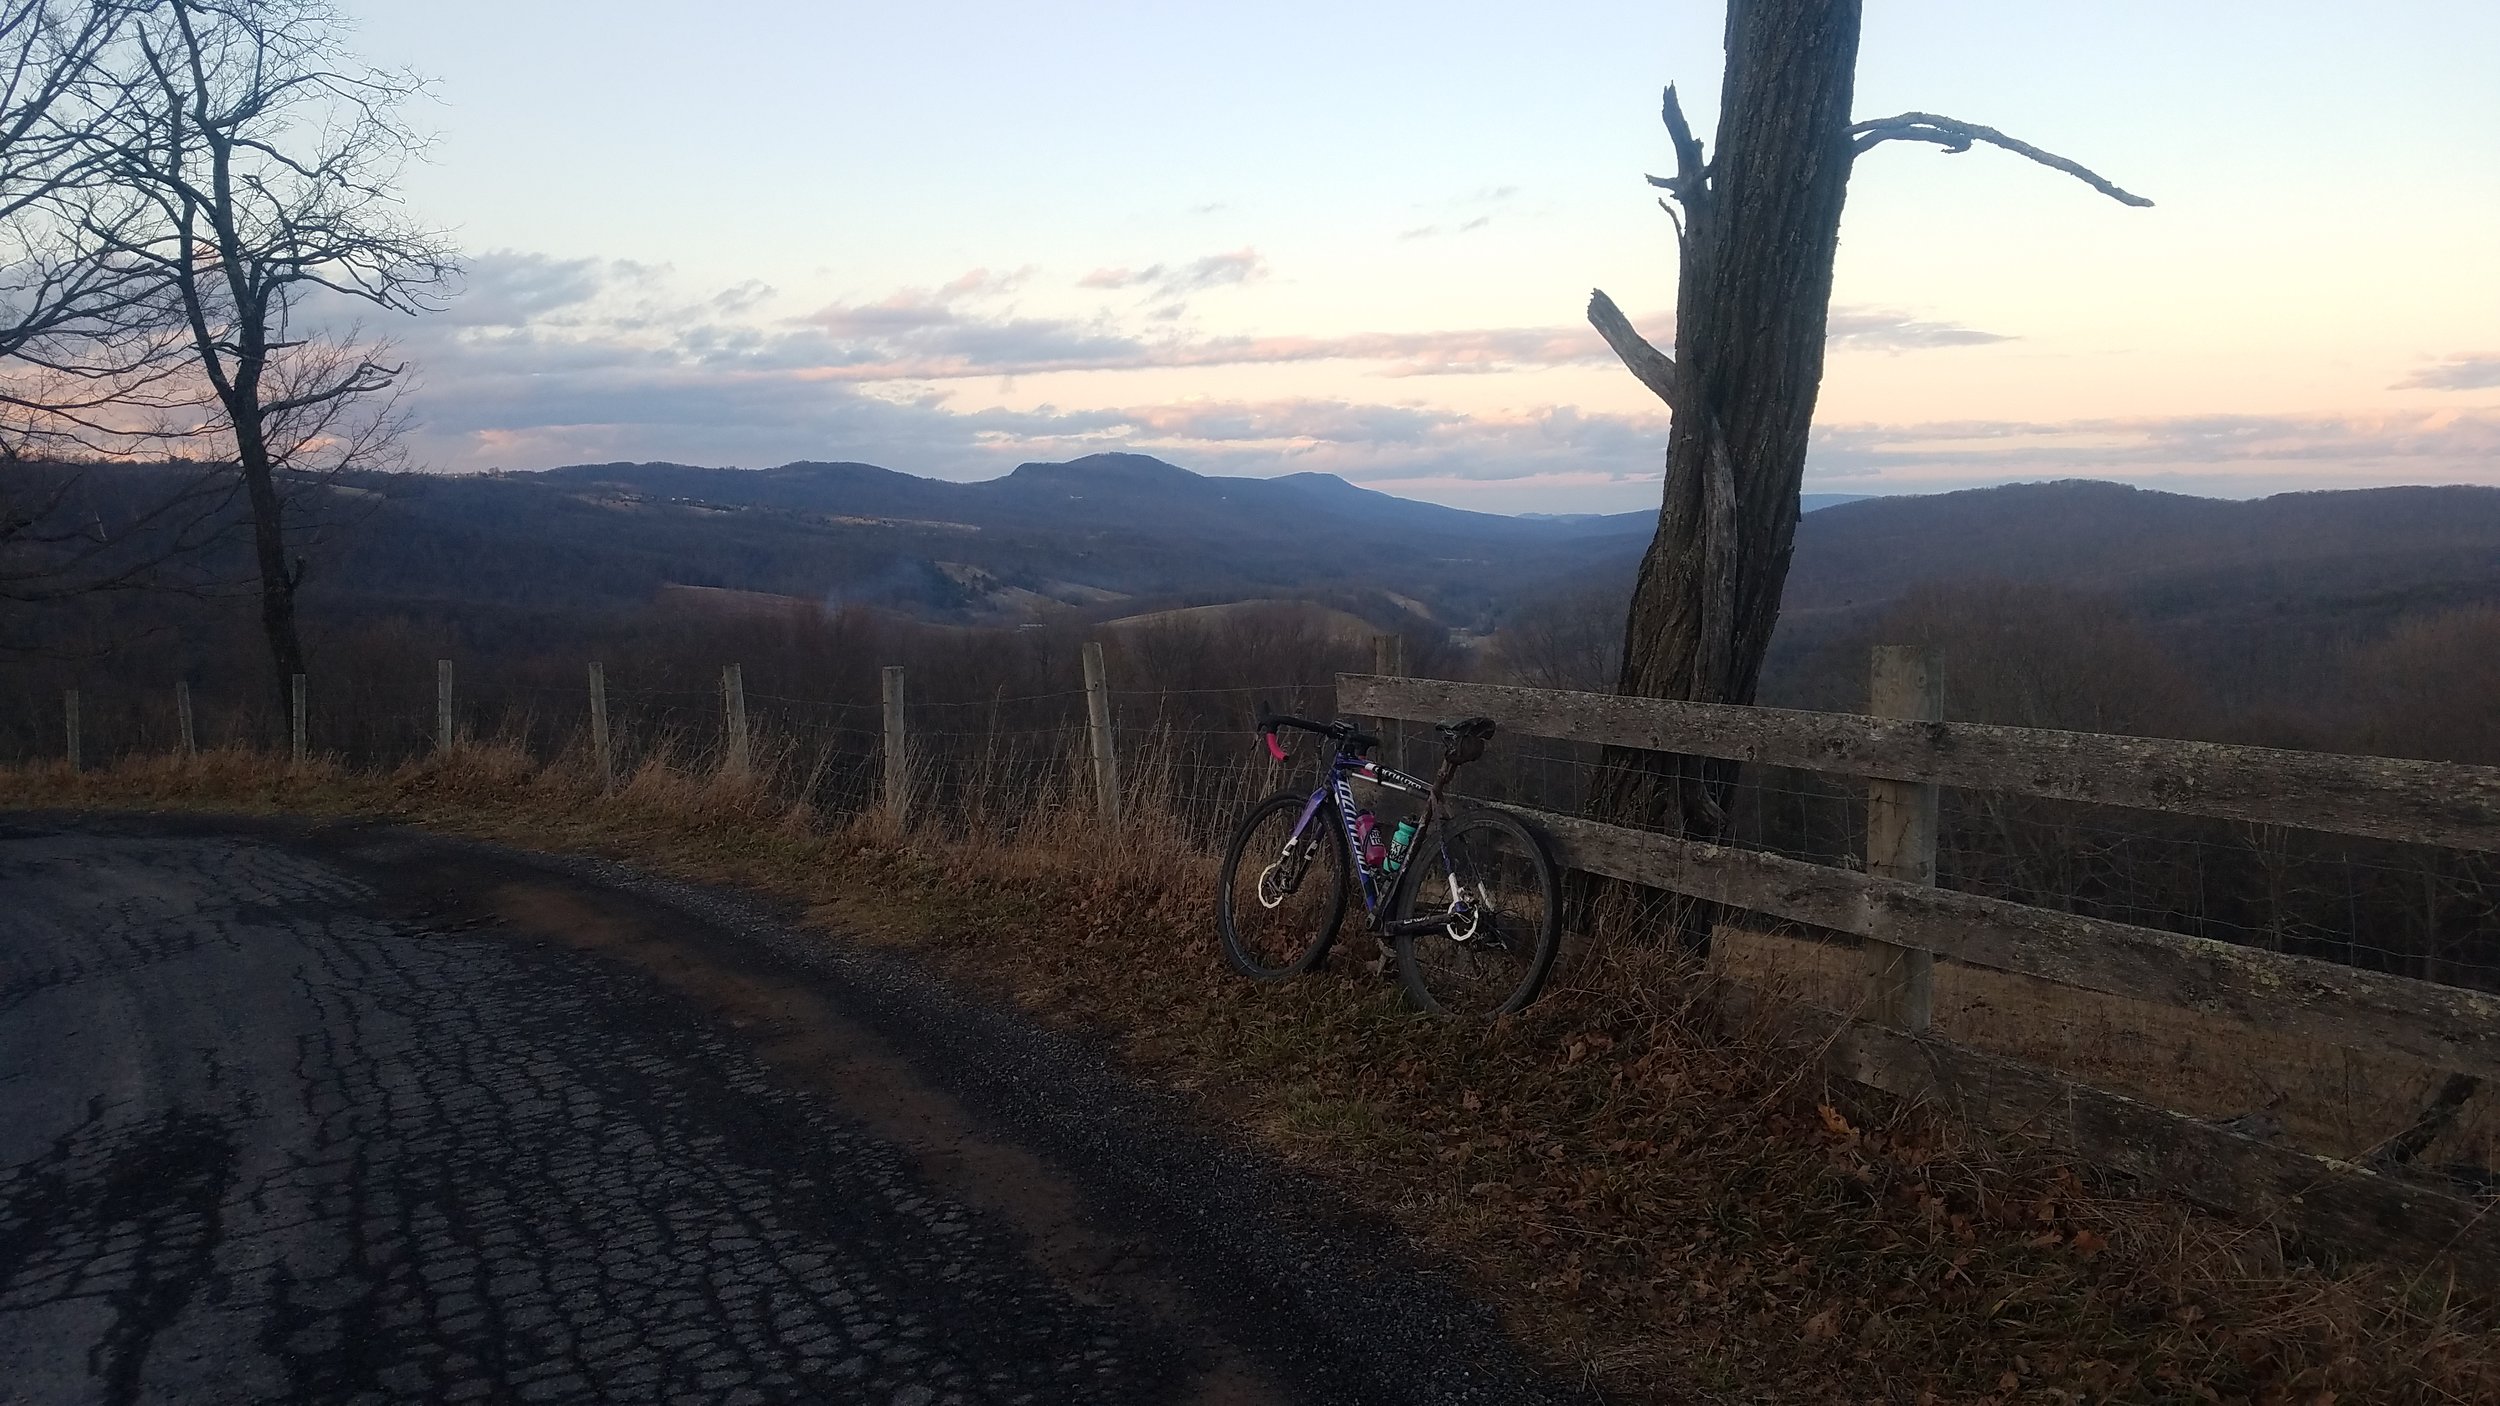
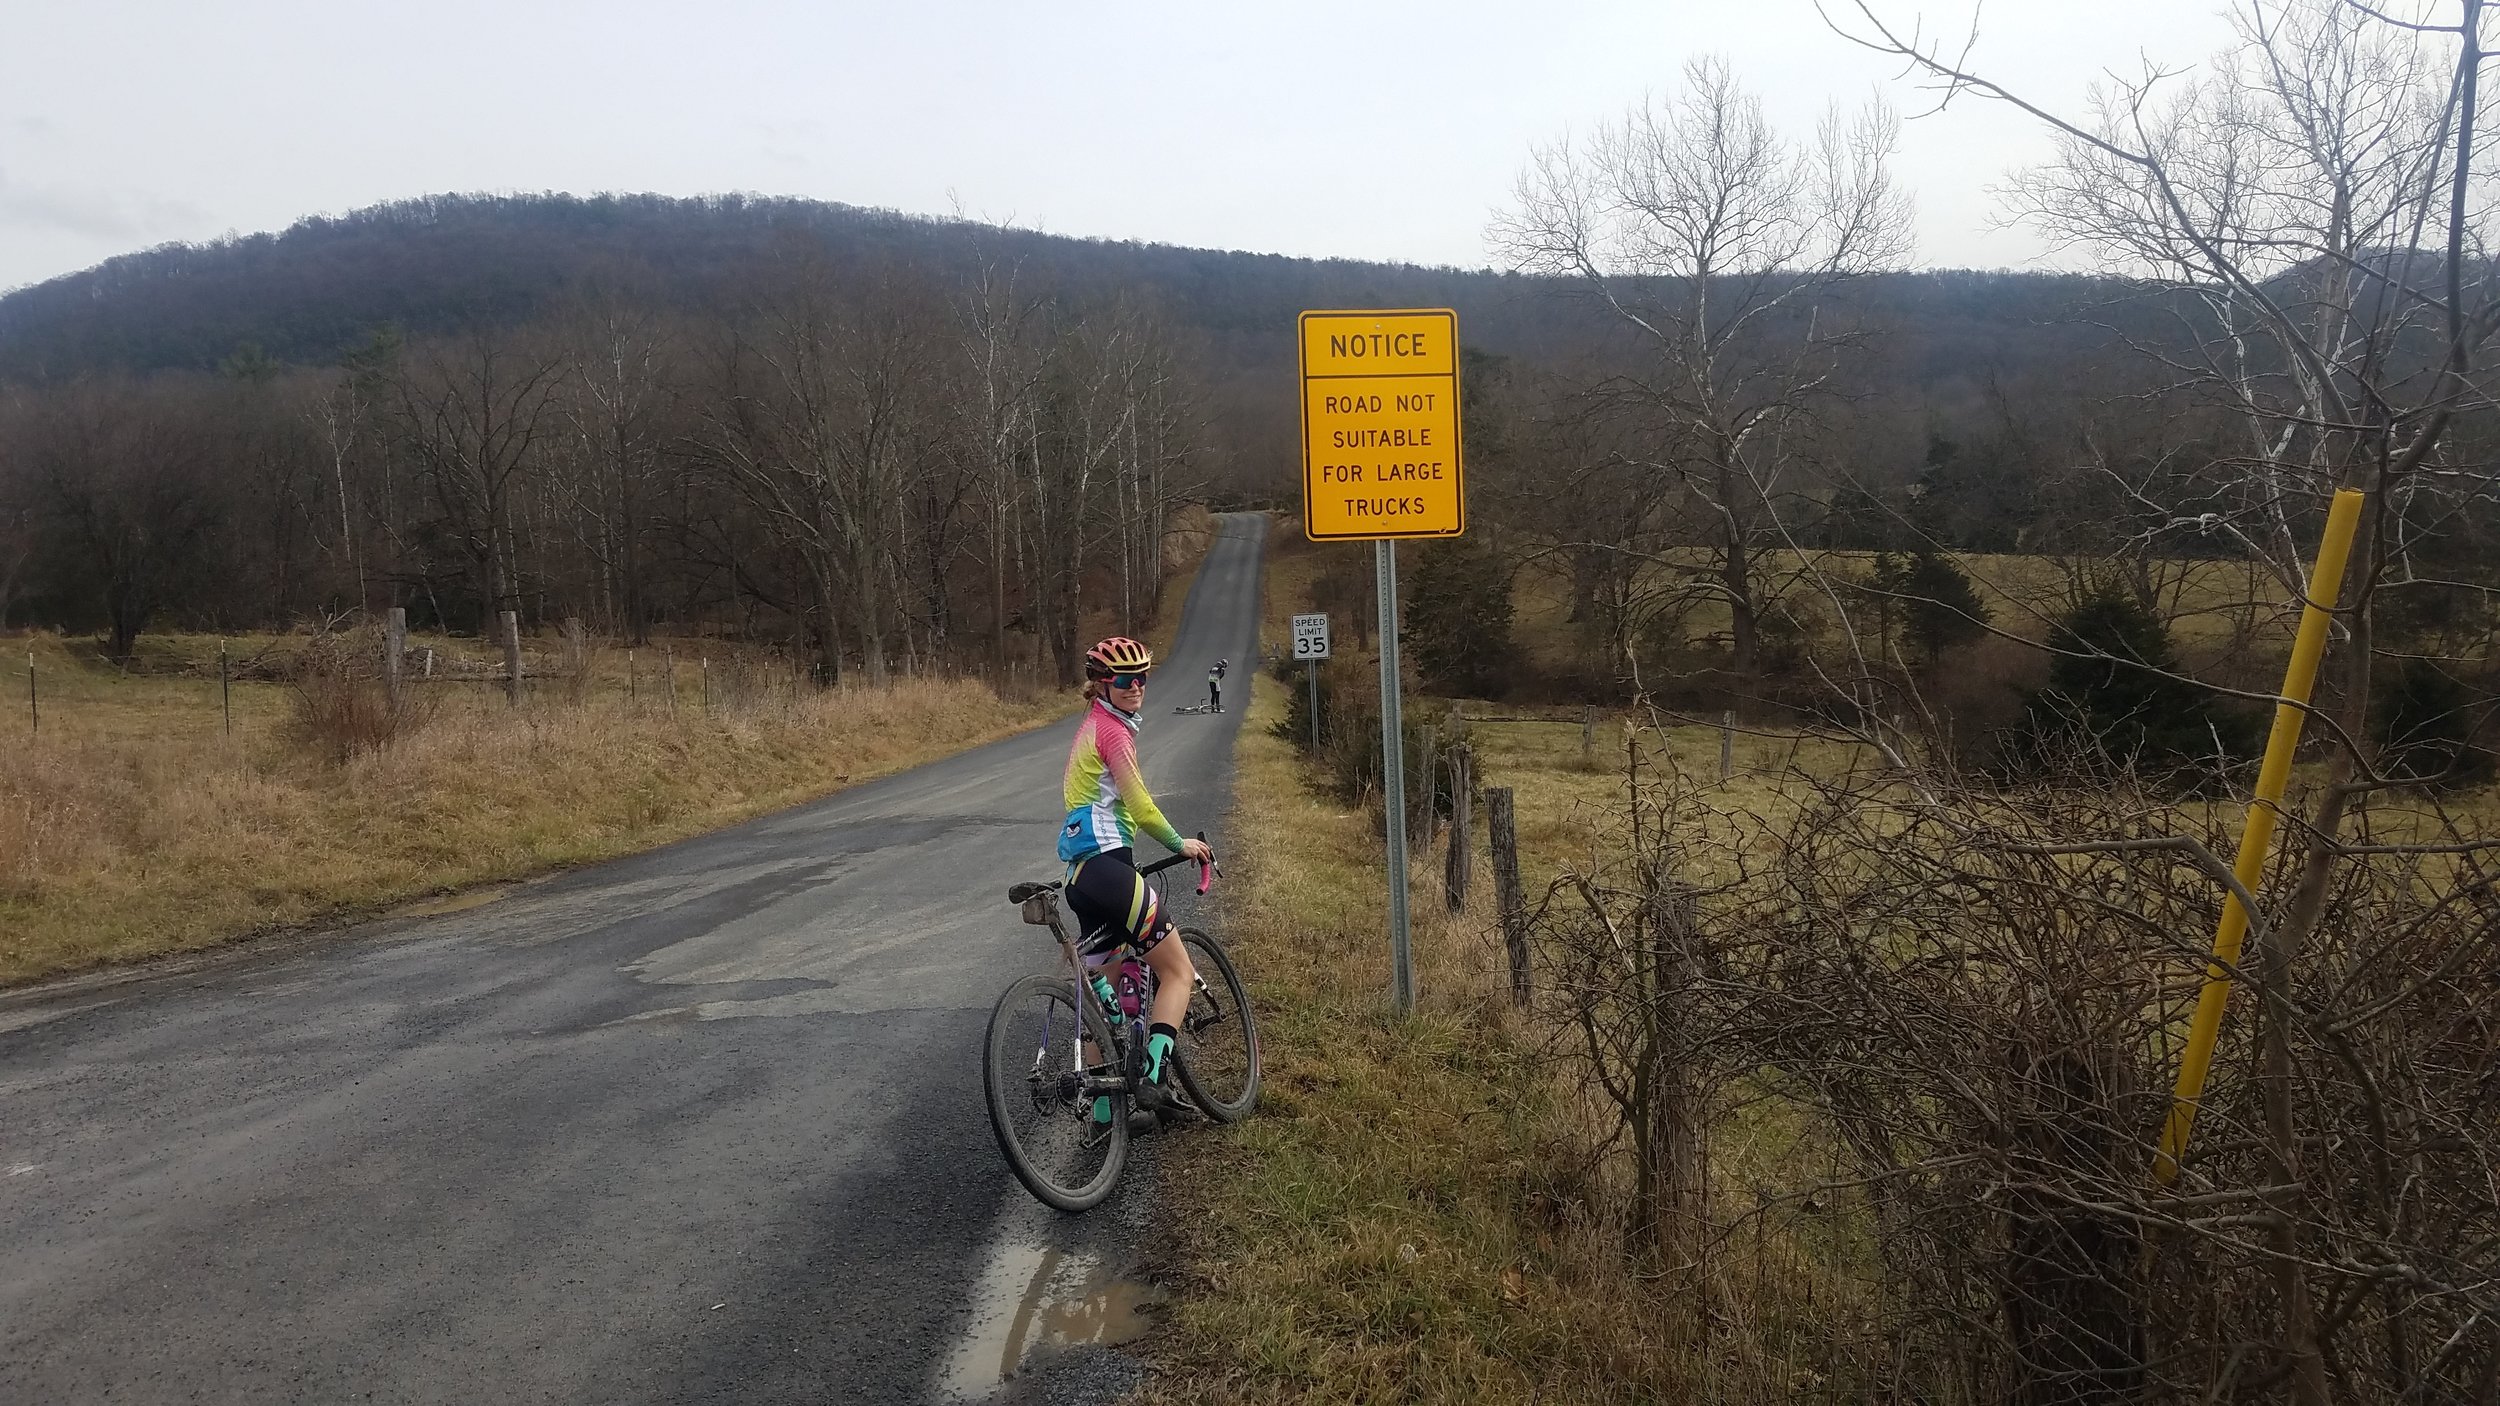
The Barn exists about 5 miles off of Shenandoah Mountain Rd, which was our gateway to dirt road paradise on our first ride of the weekend. It was also how we got back to the barn on all 3 of our rides, with a different way to climb up to it each time.
Turn into Shenandoah Mtn Rd, and dirt road paradise!
I believe, for all of our rides, that 70-85% of the roads were gravel or dirt. And traffic? Let's just say I think I saw maybe 10-15 cars while we were out riding for the whole weekend.
It's challenging to pick a favorite ride of the weekend, but I would say it was the route we did on the 2nd day. It was just about 58miles with almost 7,000ft of climbing. There were 3 decently placed climbs, each with its own personality. Dumpling Run Rd was packed smooth gravel with only a few steeper pitches. The climb up Hinkle Mtn was brutal. Over 5 miles of steep, technical dirt road left me feeling hangry. Thankfully, there is a newly opened general store (open on weekends) in Peru, WV that was only a few miles away from the Hinkle descent. The South Fork General store has a very cool history and great food to refuel for the last climb and miles of the ride. You should check it out and chat with the couple that own it if you're ever out there.
The general store we hit up before climbing Peru Gap.
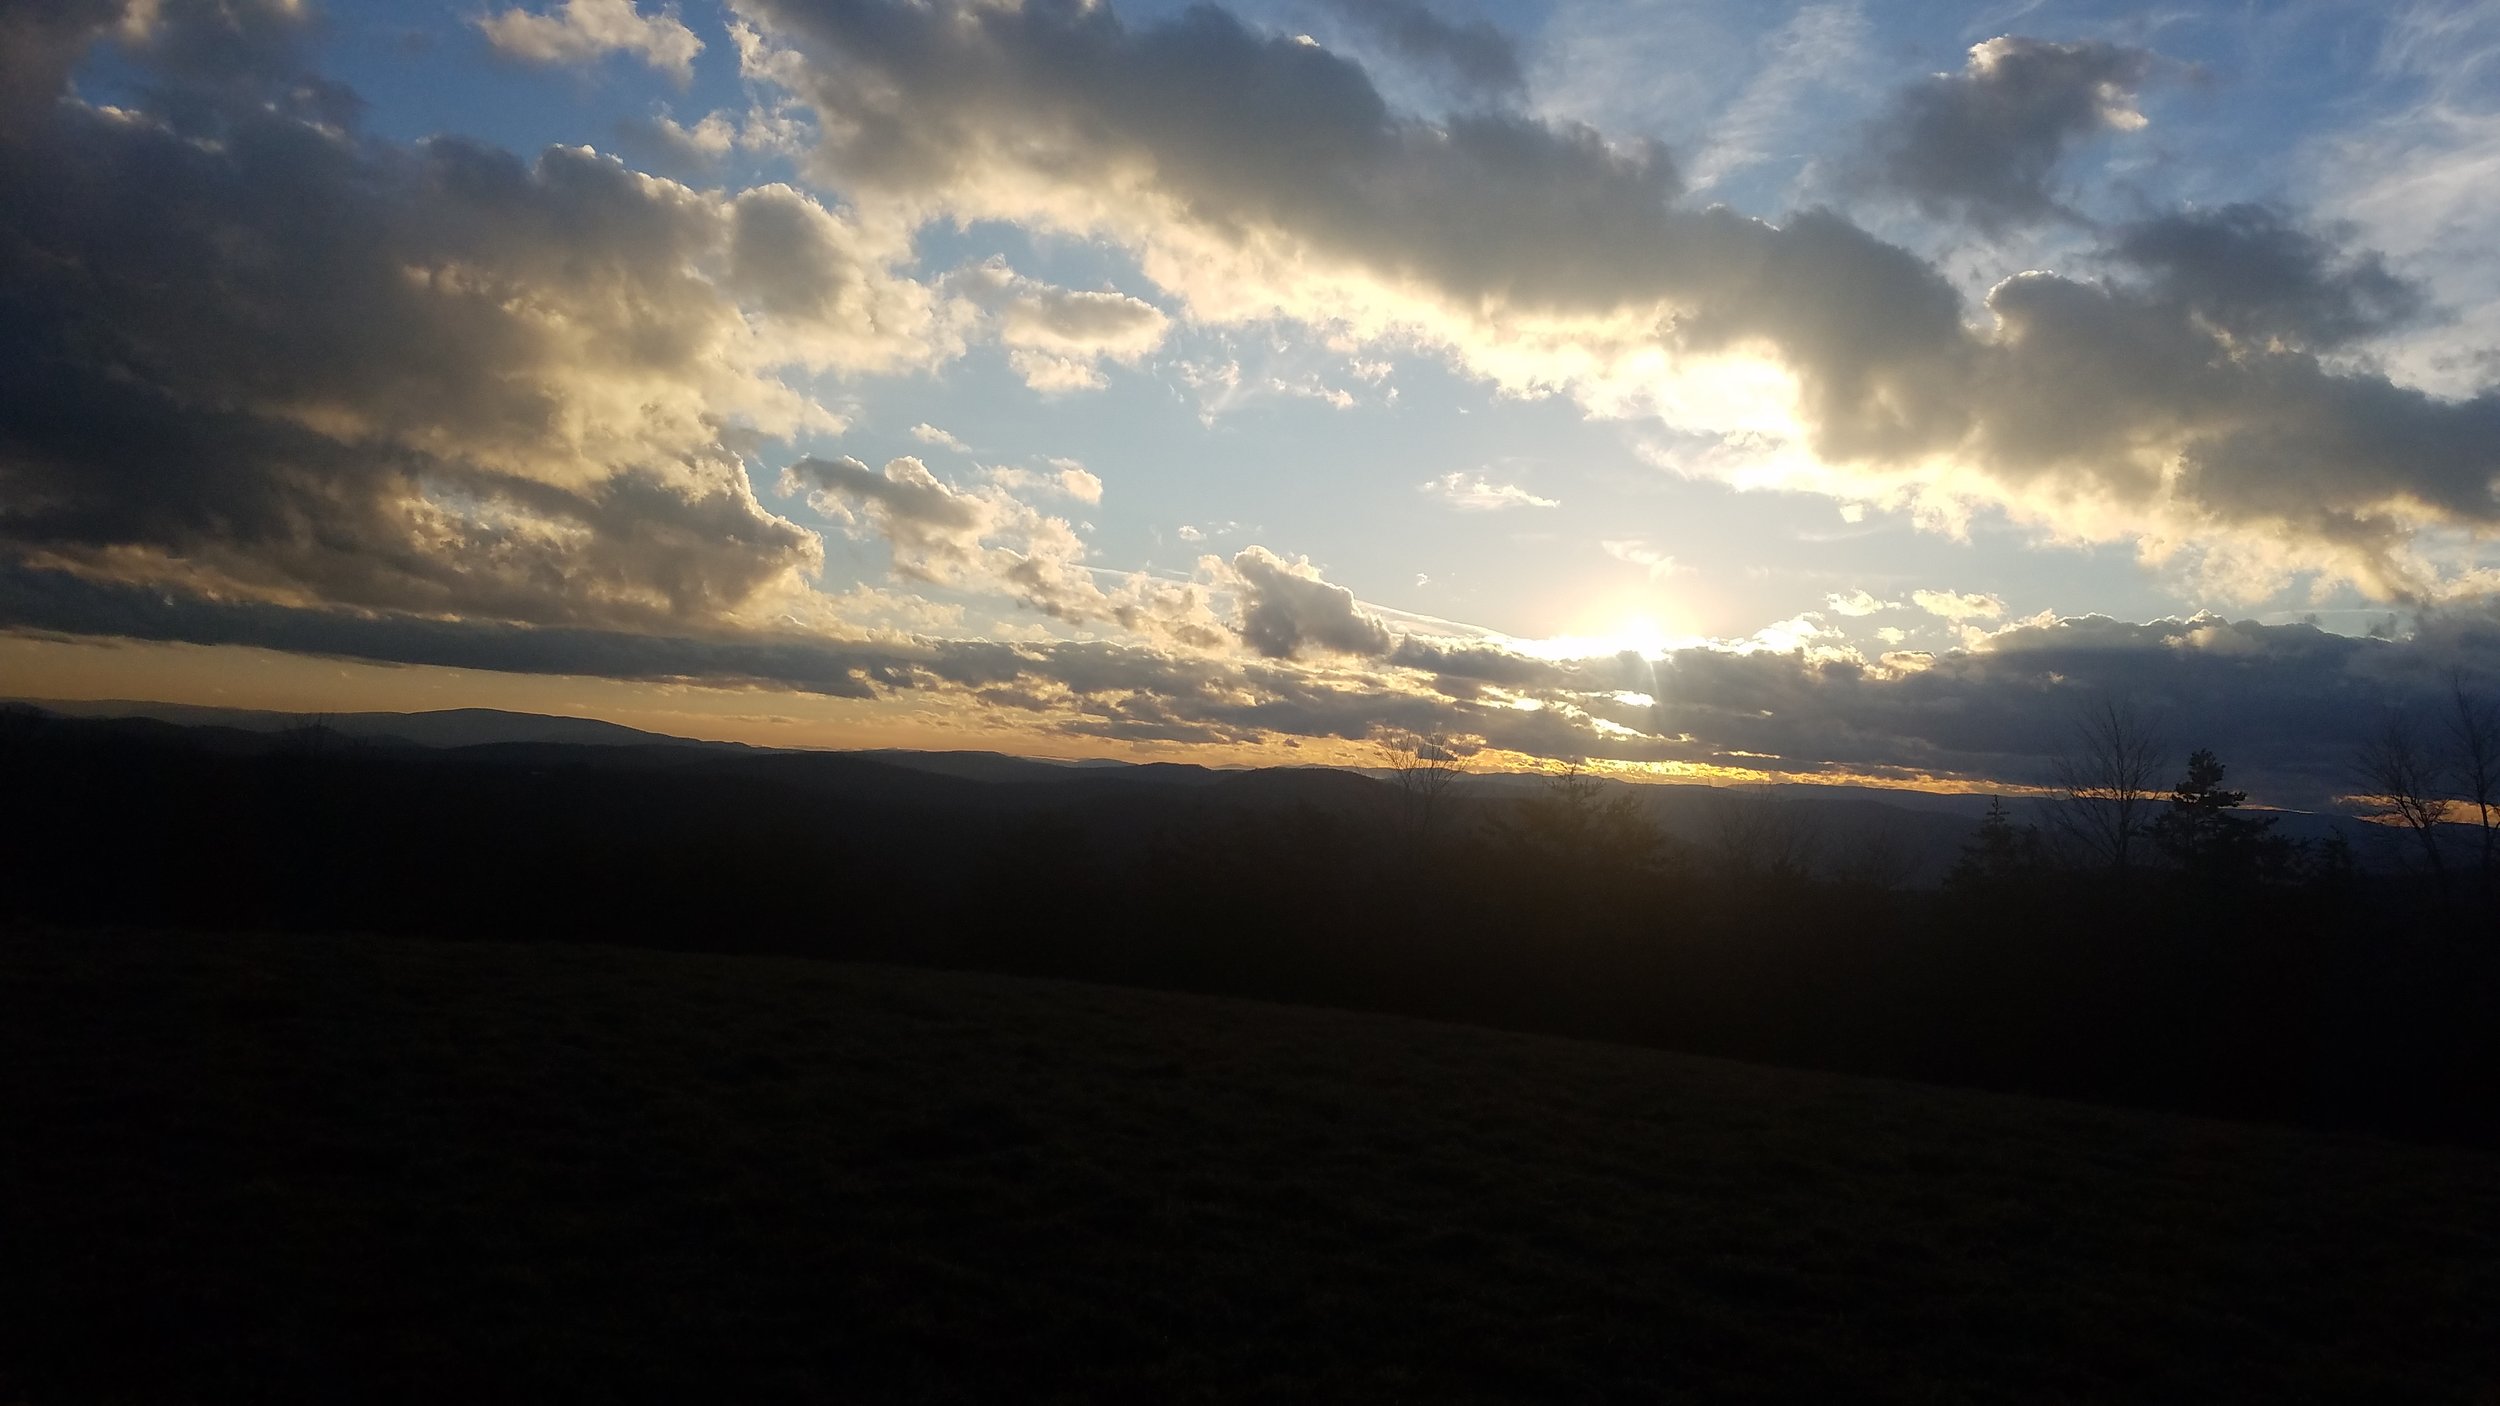
We had stopped to take so many pictures and talk with so many locals on this ride that we got back to the Barn with just the last colors of twilight in the sky. We had lights and weren't worried about cars (everyone is so chill out there), so it was serene riding along watching the mountains get darker and spotting deer in the meadows next to us.
Sunset on the mountain
The first and last rides of the weekend were also awesome had some extra special moments. We finished our first ride with watching part of the sunset on one of Jay's friend's pieces of land (360* view), and in the last bit of the final ride we got to check out an old abandoned school house on top of a part of the mountain.
The old School House
Sunset
Photo by: Jay
Chris Inside the School House
We definitely lucked out with the weather. 50-60 degrees in the middle of January, and the rain held off until we were leaving to head back to Harrisonburg.
Raw Talent Ranch is a very special place. There's nothing else like it. The barn itself is cozy and more than accommodating.
I am looking forward to the many future adventures we are sure to have out there.
You can book time at the Barn by contacting Jay through his website, http://www.lostriverbarn.com/
Gallery featuring all 3 of our rides:


Gravelocity 2017: New roads, great gravel, awesome people
Yesterday I ventured down to Roanoke for a grassroots event: Gravelocity. According to their Facebook page, "This event is the brainchild of endurance athlete Brian Lang, and each route was expertly hand crafted by Kyle Inman and Jeff Cheng."
There were three route options to choose from:
As I really was not feeling like getting up in the dark only to be darked on while on the bike (the 94 mile loop recommended lights for riding in the dark), I opted for the 50 mile route, which started at a nice normal time of 10am. This route was also said to include 1,804m (5,918ft) of climbing. Many awesome dirt roads, amazing climbs and descents were promised, and I was looking forward to riding somewhere new.
Just after our first big climb up to the Parkway (around 20miles into the ride) a large group of us hung out for some snacking and socializing. It was then that Jeff asked me if I'd like to take part in a "bonus loop." I said, "Yes!" of course. So we spent a little extra time riding north on the parkway in order to drop into another valley by way of AWESOME gravels before rejoining the course to once again climb gnarly dirt up to the Parkway and head to the finish
View from the Blue Ridge Parkway
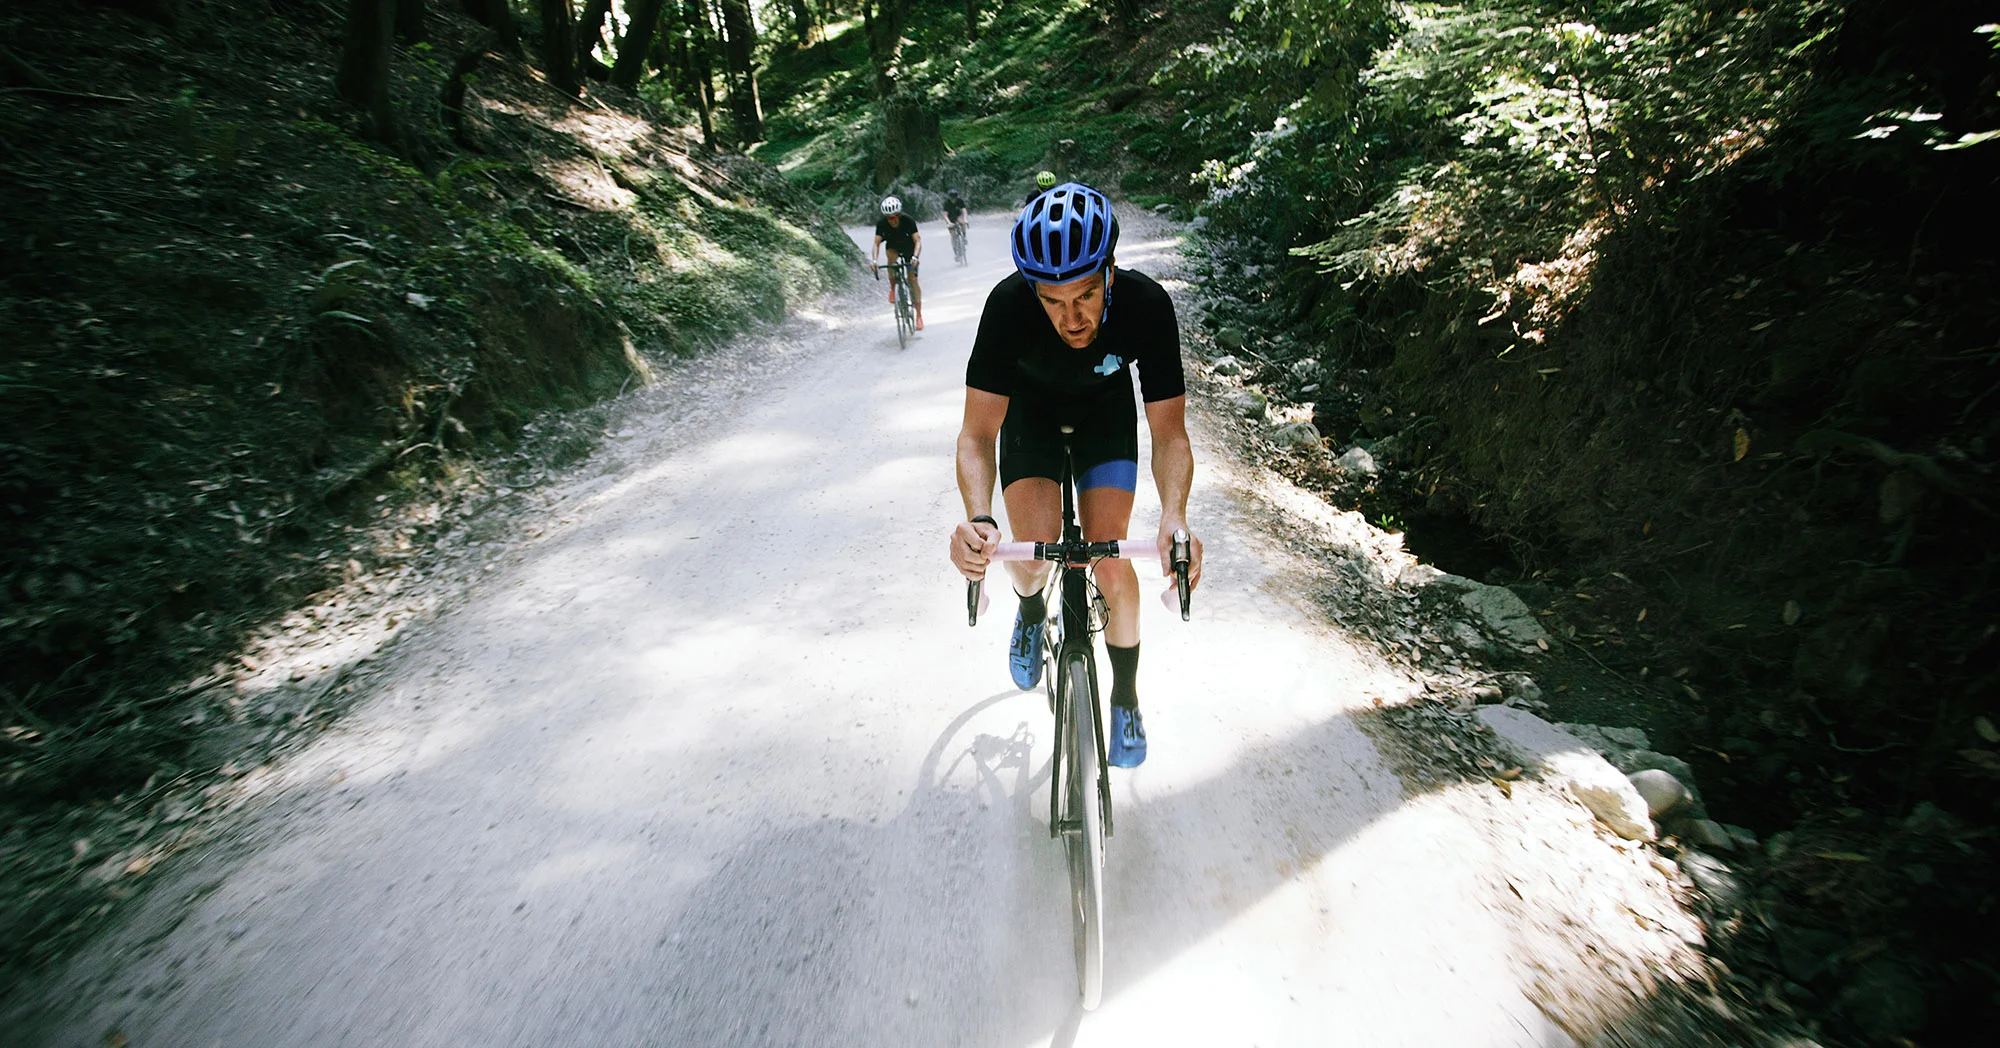
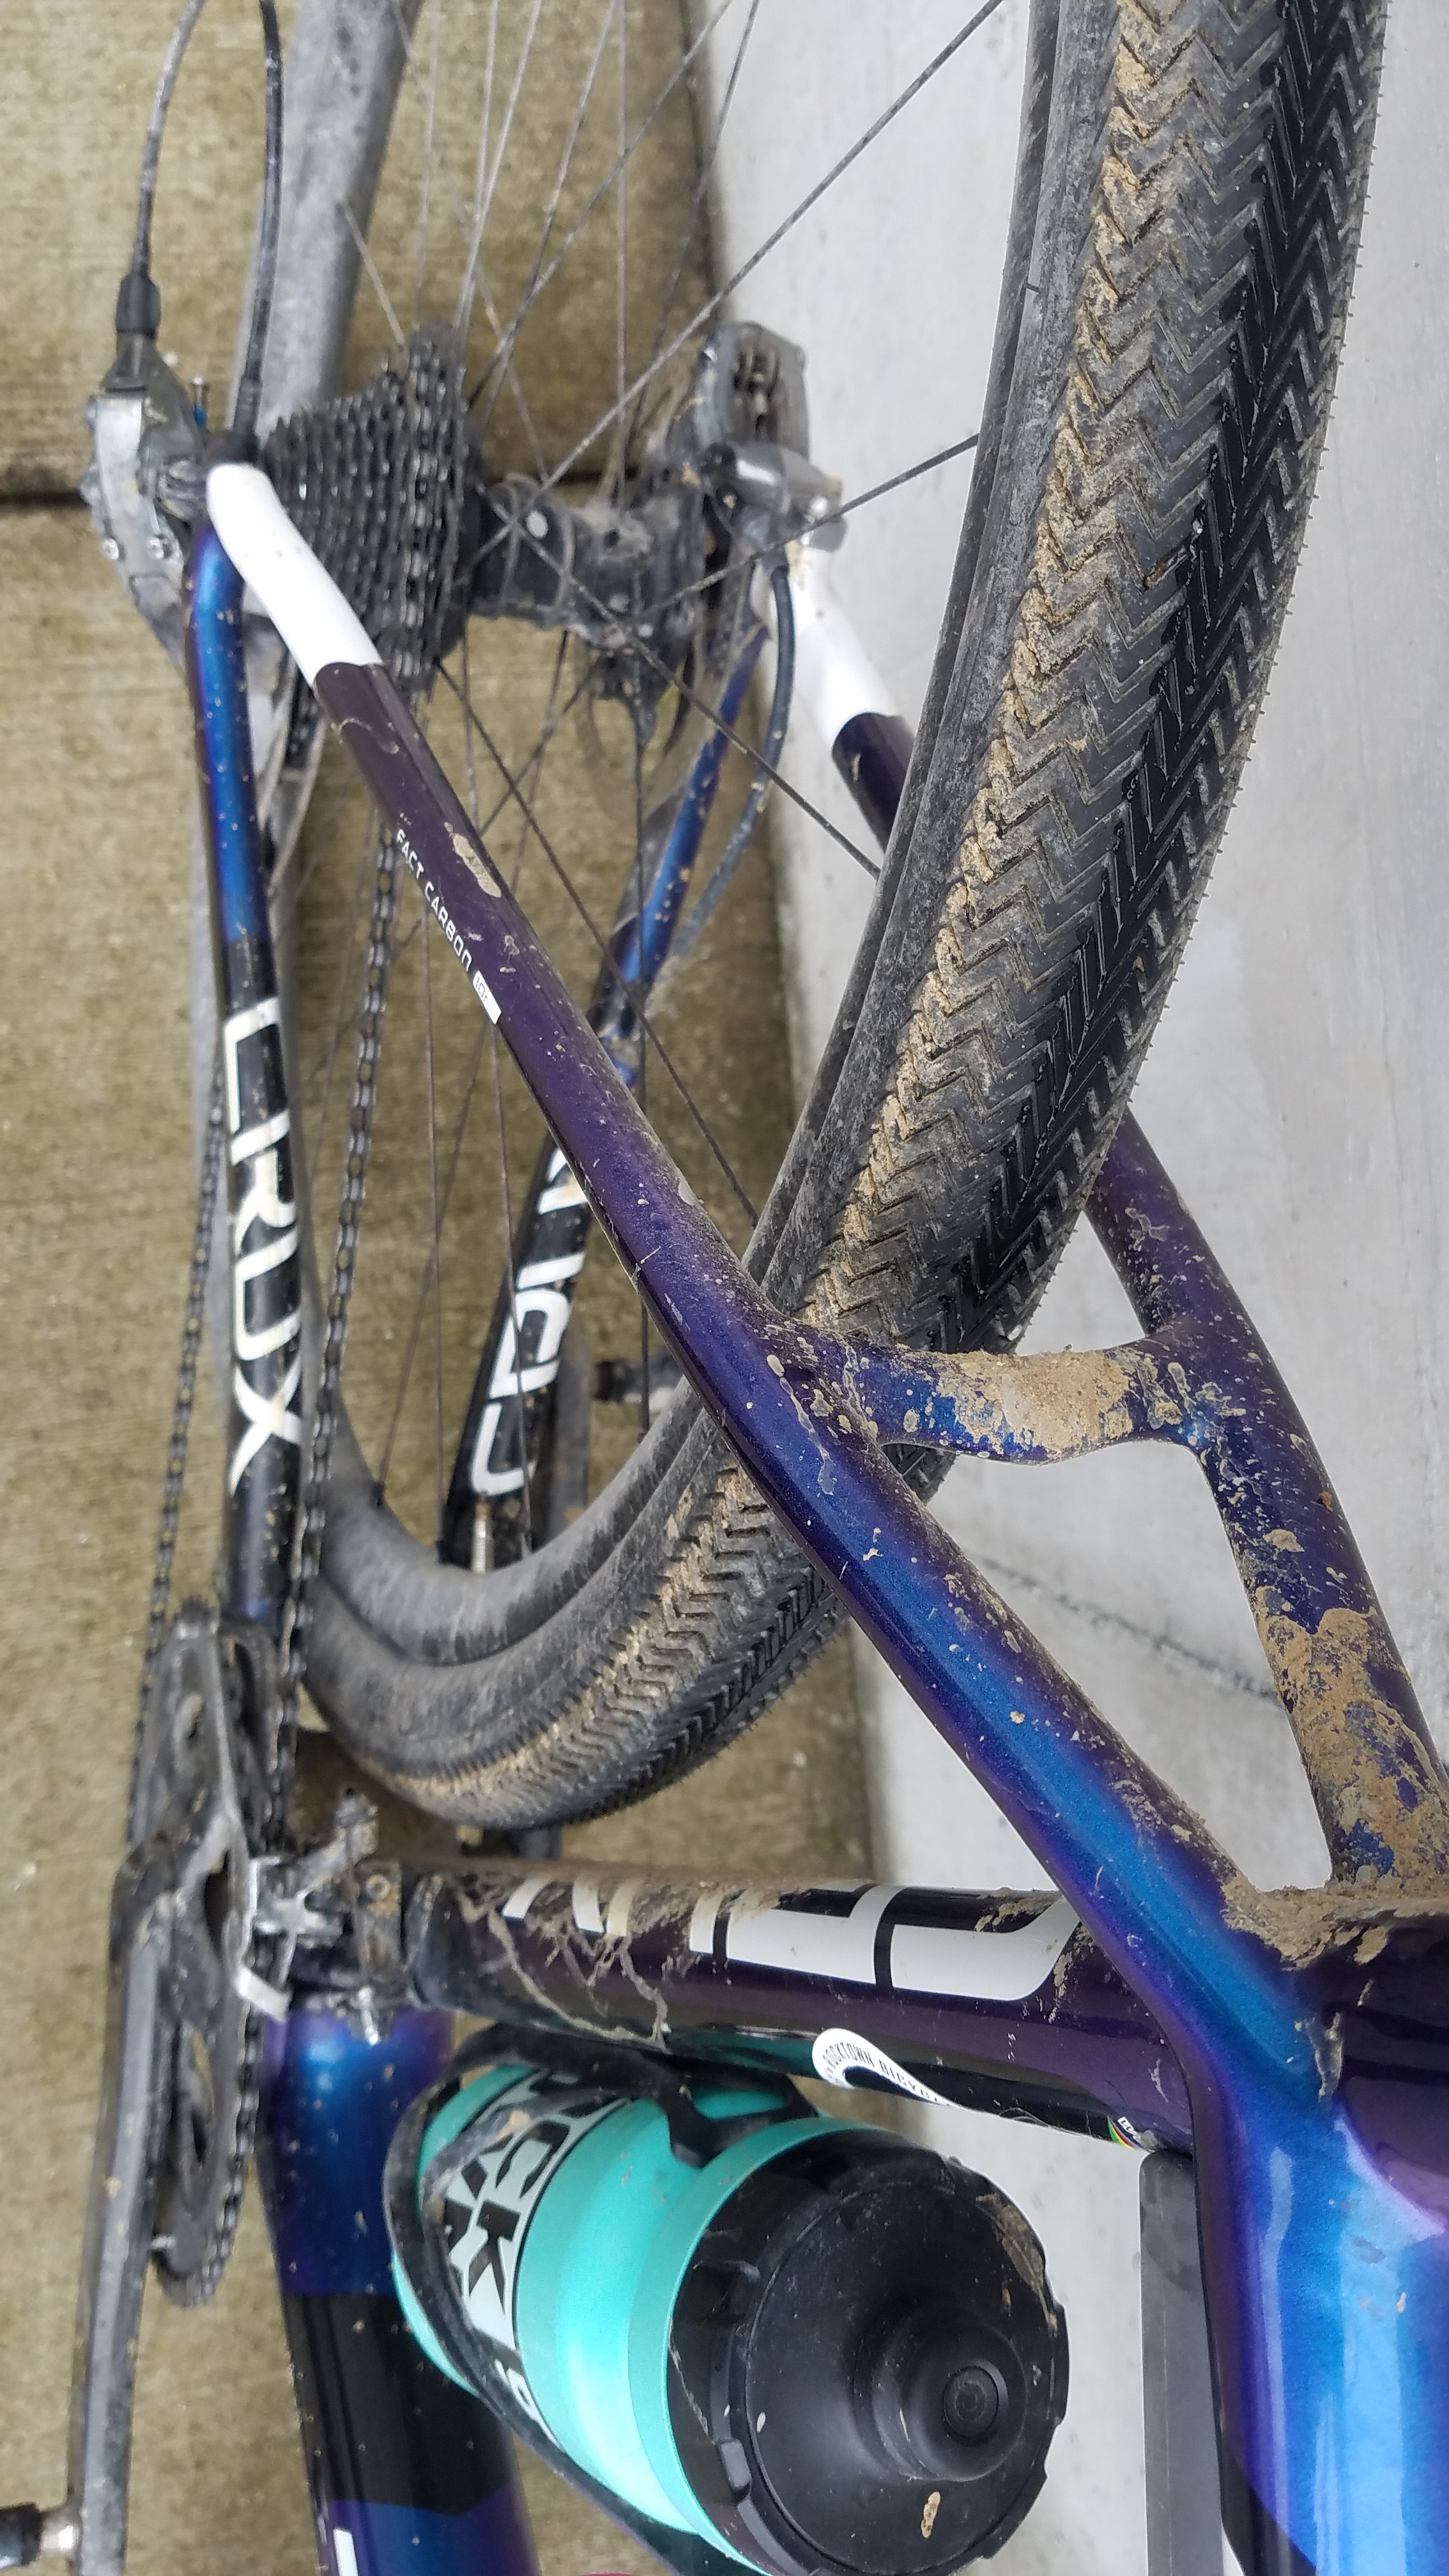
I don't think my bike set up could have been any better for this ride. I ran my lovely blueberry Crux Pro with a 1.8 Sworks Renegade in the front and one of the new Specilaized 42c Sawtooth tires on the back. These tires ripped through the gravel so well! On one of the gravel descents (in the bonus loop portion of the ride), I hit over 43mph, without trying. The bike just handled so well and the tires gave the confidence necessary to lay off the brakes and get a little dirty in the switchbacks. You can click through the gallery below to get a closer look at my set up. Gearing was 50/34 up front and 11-28 in the back. PSI in the front tire was 50, and 60 in the back. Tires can be set up tubeless, I was just lazy and didn't feel like doing the setup for it. Haha.


Having fun going up the first climb
I would say that gravel/dirt roads made up 75-80% of this ride, and they were absolutely AMAZING! Some would call those roads "messed up," but that only ups the fun factor. The challenges of handling technical terrain were not only limited to the climbing portions, but also applied to descending. In fact, some of the descents were gnarlier than the climbs. The biggest climbs of the day were forest access roads that lead up to the Blue Ridge Parkway. They were bumpy, wet, loose, and steep in a lot of places. If you've ridden the Big Bear Loop, just outside of Harrisonburg here, I would compare the terrain of the last descent from the Parkway to the ridge portion of Long Run Rd in that loop. It was sick! Total mileage was 63.1 with 6,989ft of elevation.
I'm really happy I ventured down there to take part in this ride. Everyone was in good spirits, and the roads only got bettered as the mileage increased. I definitely recommend joining in one of these rides if you ever get the chance.
Here's a link to a virtual tour of the ride by Relive.com: https://www.relive.cc/view/833452621

And here's a link to view my ride on STRAVA